General
In the surveys module, it is possible to create different surveys that can be sent to users via email or during mass event registrations. This guide explains all parts of a survey in general terms, from creating a survey to introducing the parts of the editor. Instructions for surveys made specifically for mass events can be found here. For instructions on how to send the survey using email, check the instructions here.
Start
A new survey can be created by going to the survey module and pressing the New button. In the beginning, there is only the need to give the name for the survey and determine who is responsible for it. After that, the user can press the Save button and the empty survey template is created.
Quick Start Guide
- Go to the survey module and press

- Fill in the form and press

- Open the survey and press

- Choose Add/update survey
- Enter wanted questions and press
- Add the survey to the wanted email template by using the link type: survey
Setting up the survey
To begin creating the survey, navigate to the survey module and press the new button ![]() . Then you need to fill out the survey information to the following form:
. Then you need to fill out the survey information to the following form:
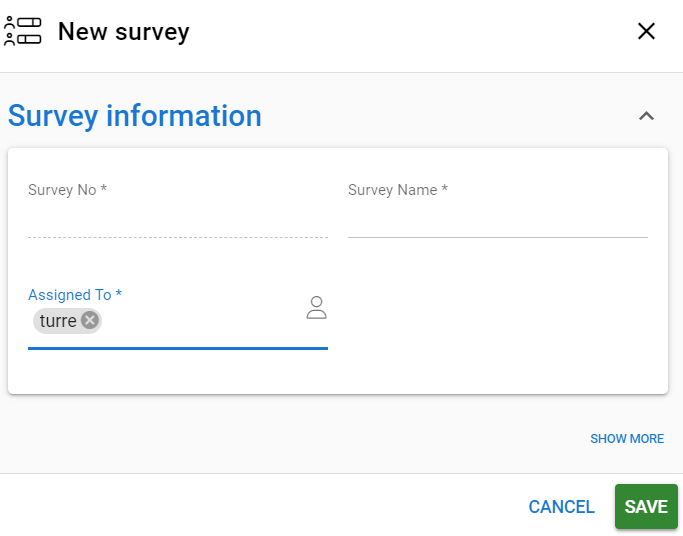
At its most basic level, the survey needs only a name and a person to whom it is assigned. You can always click the Show More button in case you want to fill in more information in advance. Available fields and required fields depend on your system settings. When you are done, press Save and the entity card for the survey is ready.
Creating and editing the survey
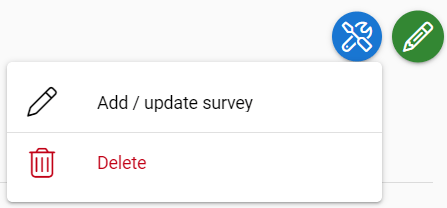
Next, it is time to navigate to the survey itself by clicking it on the list view. Pressing the edit button ![]() will allow you to edit the information in the entity card that you gave to the survey in the previous step. We have only created the survey entity card at this point, so there is no actual survey to be sent out yet. All changes to the survey are done through the same function, so when you want to add or modify the survey, use the module tool button
will allow you to edit the information in the entity card that you gave to the survey in the previous step. We have only created the survey entity card at this point, so there is no actual survey to be sent out yet. All changes to the survey are done through the same function, so when you want to add or modify the survey, use the module tool button ![]() and select Add/update survey.
and select Add/update survey.
Survey editor
In the survey editor, you can create the survey by adding the questions and adjusting the survey settings on the whole survey, and each page separately. Each question can also have its own individual settings. We will now introduce the parts of the Survey Editor with a brief explanation of what the different parts do (see figure below).
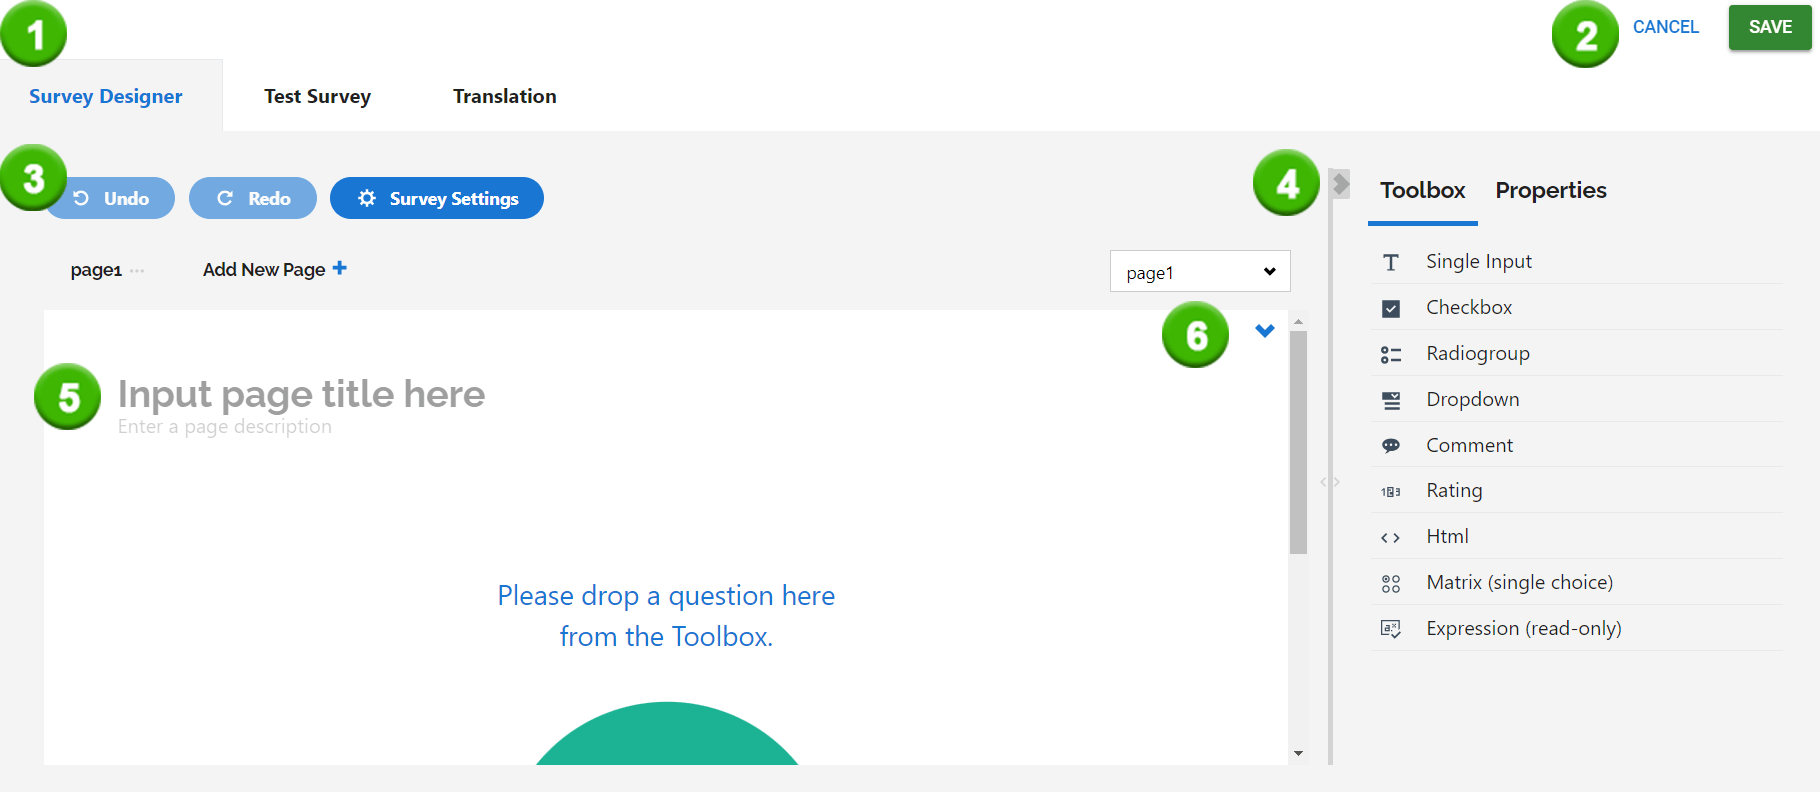
Tabs (1) allow you to design the survey, test the survey before sending it and translate the survey to different languages. Cancel and Save buttons (2) let you exit the survey editor and depending on your choice you either cancel all possible changes made to the survey after the previous save or save all the edits you have made to the survey.
Buttons and page navigation area (3) allow you to quickly undo/redo edits that you have made to the survey, navigate quickly through all the pages of the survey and use the Survey settings button to edit the settings of the survey.
Toolbox and Properties (4) are used to modify the survey to your liking. Elements like questions are added to the survey through the Toolbox and the settings of the survey, individual pages, and questions can be edited through the Properties tab.
Text area (5) is used to visualize all the changes. In the survey editor, you can in most cases use both the text area and properties bar to make changes to the survey. Changes through the properties tab will be shown in the text area in real-time, so you can also use it as a preview area even if you like making all the changes through the Properties tab.
Two picklists (6) allow quick management for the pages (white box) and quick access to adding a logo on the page (blue arrow).
Survey settings
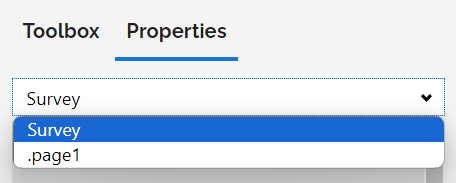
The survey can be edited in multiple ways through the Properties bar. You can either use the survey settings button ![]() or click the Properties tab. When using the Properties tab, just ensure that the first picklist is set to Survey instead of a single page or question (picture below). For a more in-depth guide read the article Surveys – General settings.
or click the Properties tab. When using the Properties tab, just ensure that the first picklist is set to Survey instead of a single page or question (picture below). For a more in-depth guide read the article Surveys – General settings.
After you are happy with the settings you can start adding questions to your survey.