General
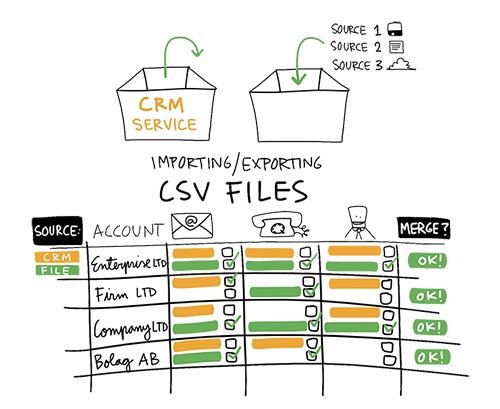
CSV data importing is supported in many modules in the CRM system. The Import button ![]() is located in the toolbar at the top of the page of every module. The visibility of the tool is determined in user profiles, where an admin user can set users’ rights for the tool (for more information, see the guide System Access (→ Profiles)).
is located in the toolbar at the top of the page of every module. The visibility of the tool is determined in user profiles, where an admin user can set users’ rights for the tool (for more information, see the guide System Access (→ Profiles)).
CSV data import can be used in the following modules:
- Accounts
- Contacts
- Potentials (Opportunities)
- Leads
- Campaigns
- Campaigns – Contact results
- Products.
Note: You can also export data from the CRM as a CSV file using the Report Generator.
About the CSV File Format
The CSV data files imported to the CRM-service must be done by the customer and they need to fulfill the following criteria:
- In a CSV file all the rows must have similar data and the same amount of columns.
- There are no line breaks in any column.
- Any of the numerical values do not include any separators for thousands.
- The max character limit for a single cell is 255 characters (Note that the CRM field may have a lower character limit and the imported text, if greater than the limit, the text will be cut off at the character limit of the field.).
- In all of the numerical values the decimal separator is a dot.
- The file must be UTF-8 encoded.
- The file contains a header row, informing the content in the columns (not compulsory, but the header row makes the matching process a bit easier).
- The date format is yyyy-mm-dd
- Multi-select picklist values need to be separated with |##| . Note the blank space between the value and the separator (example: Owner |##| Contact person |##| Other ).
- The cell separator is “,” (comma) in the CSV file.
- example: “Company AB”,”Businessroad 12″,”Helsinki”,”1787.19” “,”358212121212”, …
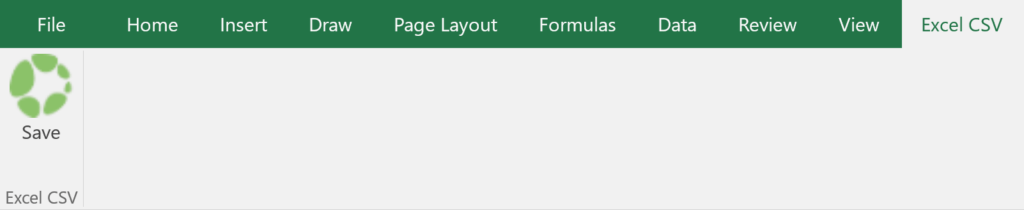
To ensure the right format of the CSV file, it is recommended to use the CRM-service’s own CSV Add-in to save the files in Excel. The use of the add-in is easy: the file is first prepared normally and then the file is saved with a separate button on the Excel CSV tab (see the picture below).
The Excel CSV Add-in can be downloaded by clicking the following link: ExcelCSVAddin (.zip). Do note, that the add-in is only compatible with Windows systems.
Importer
With the new user interface, we recommend using an external input program. Next, we will review how the Importer, which uses the REST interface, works. Installing the program is easy, just download it from the link CSV to CRM -importer 1.1.3 and follow the instructions of the installer.
CSV to CRM -importer quick guide
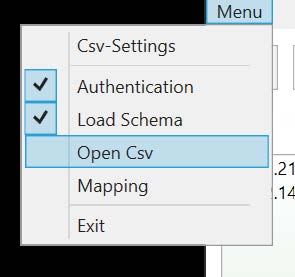
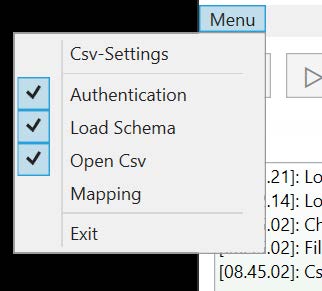
Using the importer itself is based on the following steps:
- Login
- Loading Schema
- Loading the CSV file
- Field mapping
- Checking the settings
- Parsing & Importing the file
Login
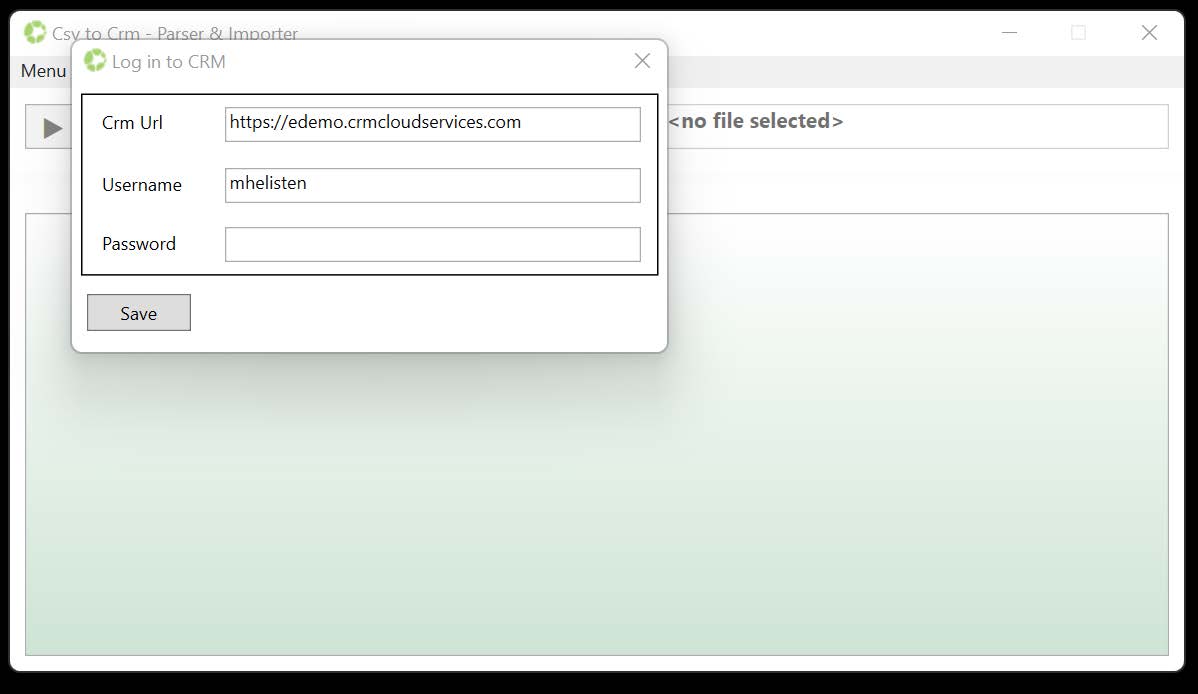
LoginFor the first time, give the crm address in the form of an example (including https://), username and password. After pressing Save, the program saves the login information (but does not log in yet). The password is never saved for security reasons.
NOTE! Two-factor authentication must be disabled in the user settings while using the tool.
Loading Schema
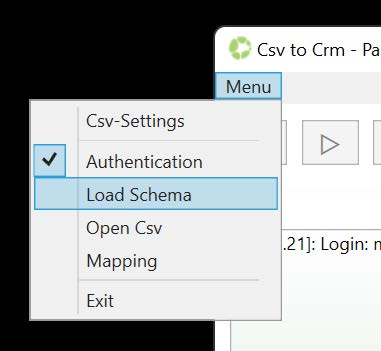
After saving the authentication data, the schema must be loaded.
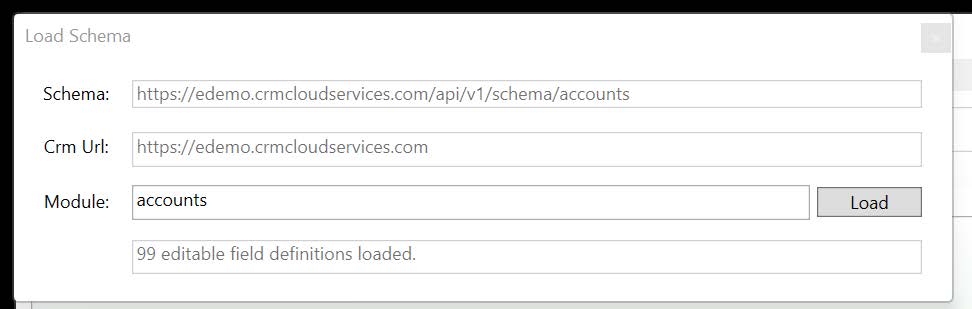
This requires the correct name of the module. The entire address of the schema appears on the top line, and the number of field definitions read from the schema is on the bottom.
NOTE: Crm Url must end on .com, and the user needs to have permission on the module where they want to load the schema from. The schema will only show fields the user doing the loading has permission to see.
Loading the CSV File
At this stage we look for the right CSV file from the computer.
Field Mapping
Defining in which fields the data of the rows read from the CSV are placed on the CRM side.
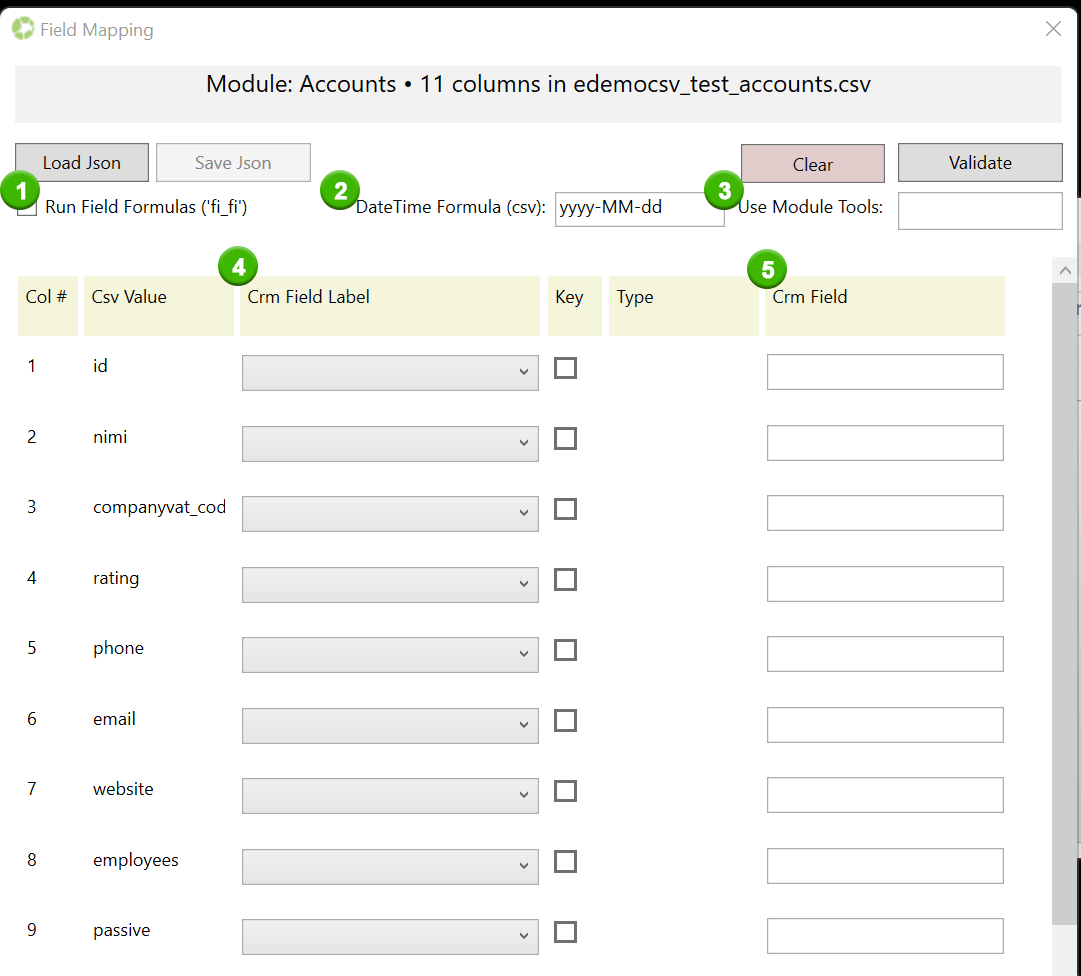
- If you want to run field formulas, check the Run Field Formulas check box.
- If the CSV contains date data, you must write in the DateTime Formula text field in which format the dates are in the CSV. When reading the format, yyyy means year, MM means month and dd means date, HH 24-hour clock, etc. More detailed information about the possible ways to define this field can be found at: https://docs.microsoft.com/en-us/dotnet/standard/base-types/custom-date-and-time-format-strings. For example, in the example CSV, the dates were of the format 17/04/1976, in which case the code corresponding to that format is: dd/MM/yyyy.
- If you want to use module tools, put the numbers of the desired tools as a comma-separated list. For example, if you wanted to use tools 38 and 151, you should write: 38,151 (without spaces).
- From the selection lists in the Crm Field Label column, the desired CRM field is selected foreach value read from the CSV. These values are read from the “Label” information of the schema for each field. The selection list contains first the id, then the main fields in alphabetical order, and finally the cf fields in alphabetical order.
- One matching field is selected to search for the same entity in CRM. It goes without saying that this is an important field, and choosing the wrong field could be quite undesirable.
When the field definition is complete, the program checks the field entry by pressing the Validate button. Both the field type and the name of the field to be saved will be visible. At this point, you should check that the information is definitely going into the right fields and make any necessary corrections (and press the Validate button again).
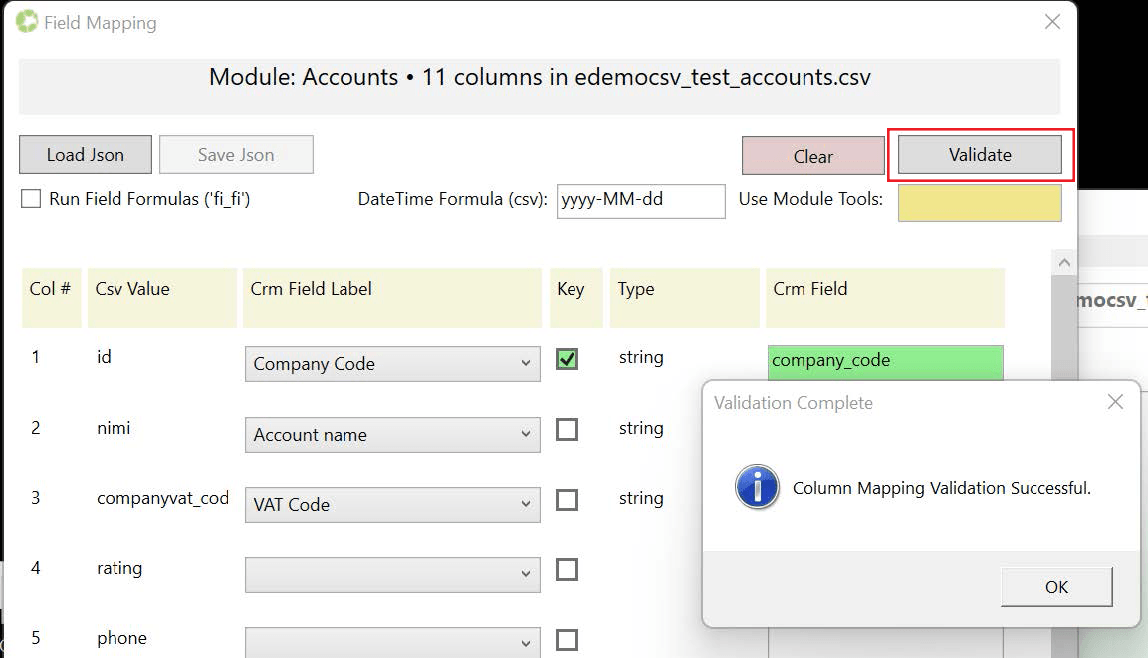
The field mapping that has passed the validation can be saved with the desired name from the Save Json button. Saved mappings can be loaded from the Load Json button. The program also automatically saves all mappings that have passed validation.
The log and mapping files can be found under the corresponding folders under the Csv2Crm folder in the user’s Documents folder.
Checking the Settings
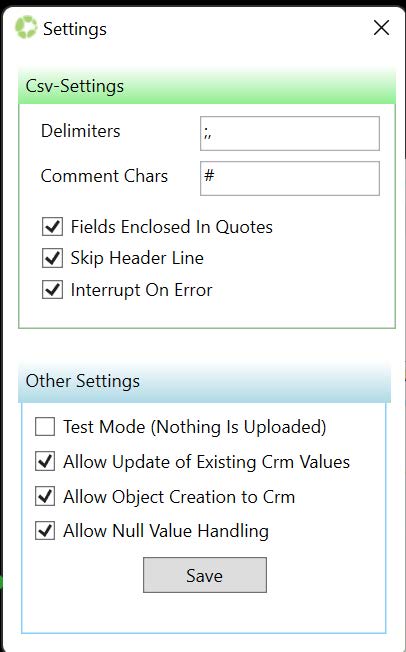
Before actually running the program, it is worth checking the settings, which can be found under Csv-Settings in the menu.
The settings under the green Csv-Settings section may need to be changed to match the CSV file in question. Separators and comment marks are supposed to be written in the corresponding text fields consecutively and without separators.
Under the Other Settings section there are important settings:
- If you want Crm not to create new entitieswith the data read from the CSV, we take the dot out of the box “Allow Object Creation to Crm”.
- If you want the existing entities of Crm not to be updated, uncheck the box “Allow Update of Existing Crm Values”.
- If the option “Allow Null Value Handling” is off, the program execution stops if the program reads a null value from the CSV file.
Parsing & Importing the file
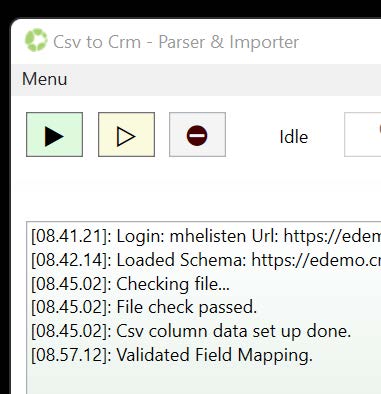
Continuous processing of the CSV file can be started by pressing the green Play button. In this case, the execution can be stopped/interrupted by pressing the red Stop button.
The yellow Play button executes only a single line, and gives more detailed feedback about which values were transferred and to which fields.
A part of the log to be written to the file appears in the text field on the screen. Log files can be viewed under the Documents\Csv2Crm\Log folder.
Note: Rows cannot be stepped back, i.e. a processed row can only be processed again by running file processing again.