Introduction
The module tool CRM2 Send email enables sending email templates in the new interface to individual contacts. You can also include a document template and/or static files from the Files module to be sent as attachments to the email. The tool can be activated for the Contacts module and any module that has a relation to a contact. The selected email template can be sent automatically with the predetermined contents in the email template, or you can enable the users to manually determine the subject or include a manual message in the email just before sending it.
NB. Sending individual emails with module tools reduce the monthly quota also used in mass mailings.
For more information about module tools in general, see the guide Module Tools.
Creating the Email Template
Before creating the actual module tool, it is necessary to have the email template ready first.
The email template is created in the Email templates module like any other email template. If the template will be sent automatically (not any manual content input from the user), all needed content must be included in the template.
However, it is also possible to include a possibility for the user to add things manually to the email before sending it. This requires including tags in the template (see below).
Tags For Manual Input
There are tags that can be used to enable the user to manually add content to the email. Users can manually add the following information:
- {{subject}} – This tag can be added in the email template’s Subject field and it enables adding a custom subject.
- {{message}} – This tag enables the user to add custom body text in the email. It can be added in a text item anywhere in the email template.
- {{user:first_name}} {{user:last_name}}– This tag enables the logged-in user’s first and last name to appear as the sender of the email.
- {{user:email1}} – This sets the email address of the logged-in user to be the email address that receives all the answers to the sent email.
To add the tag, click on the Merge tags action in the text item’s toolbar and select the tag Module tool content at the bottom of the list (see the picture below).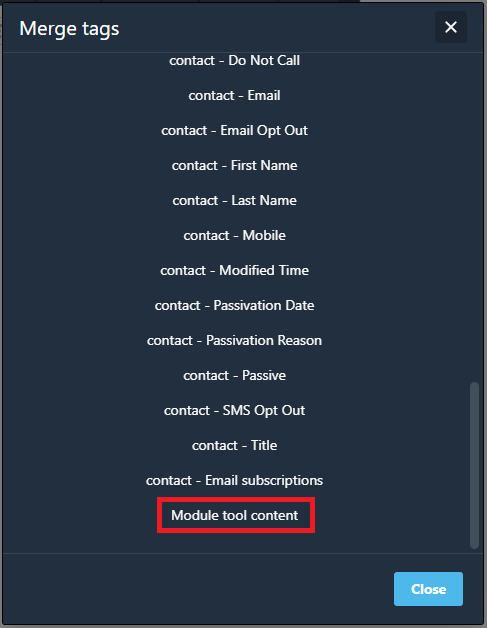
Creating the Module Tool For Sending the Email
Module tools are managed in Settings → Module Tools. To create a new module tool, click on the Add tool button at the top right corner and select the tool CRM2 Send email (in the Generic module).
In the first block Tool info, you must determine the basic information concerning the tool, including the name for the tool, and in which module the tool is created. Be sure to also make the tool active if it should be available right away. You can also include conditions for showing/running the tool if necessary (for more information, see Module Tools).
The second block Email is for determining the email template and the recipient (see the picture below):
- Email template – The email template that is sent with this module tool.
- Email type – Includes options for manual and automatic sending. If the email has any tags for manual input, select “Manual”, otherwise select “Automatic”.
- Contact field – The recipient of the email. This is either a contact field in the module where the tool is created, or if the tool is created for the Contacts module, this can be left as “None”.

In the final block Attachments, you can include a document template and/or files as attachments to the email template (see the picture below):
- Document template – The document template is to be attached. Be sure to select one that is created for the module where the tool is also activated.
- Document name – A file name for the document template.
- File – A static file attachment. You can select files already uploaded in the Files module.
