Creating Certificate Templates
Introduction
You can send certificates by email to all the contacts that have attended a certain invitation event directly from the invitation event.
The certificate is always event-specific and the information about the event, like the event name, time and place, must be written manually on the certificate template. The information about the attendee can be fetched from the CRM with tags and so each attendee will get a certificate with their own information on it.
Sending the certificates from the invitation event can be carried out with the combination of a document template and a module tool. You must also create an email template which will act as the cover letter for the certificate.
Creating the Template and Converting It to PDF
You must first create the certificate template as a text document: suitable file formats are e.g. DOCX, ODF and RTF.
Information about the invitation event (event name, time, etc.) must be written on the template manually at this stage. The attendee’s information, however, are written as tags – for instance, you can write the first name of the attendee with the tag {{onshow.data.Contacts.firstname}} and the name of the account with {{onshow.data.Accounts.accountname}}. You can use the information in the fields of the Contacts module. For more information about the tags and how to use them, see Document Templates – Using Tags in ODF/OOXML Templates.
When the certificate template is ready, you can upload it to CRM. You can do this in Settings → Document Templates.

You can create a new template by clicking the Add Template button at the top right corner and by selecting the ODF / OOXML template file option in the Contacts module (see the picture below). You can find the right option easily by selecting the Contacts module from the picklist at the top of the view.
Select the right text document in the Template field (for further information about the creation, see Managing and Creating Document Templates). It is recommended to write the name of the event in the template’s description, so that identifying the correct template is easier.

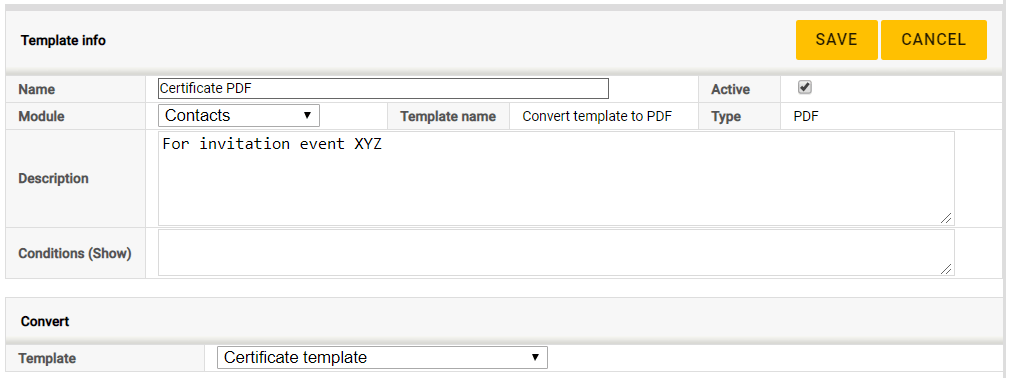
When the document has been uploaded to CRM, the next step is to convert it to PDF. Click the Add Template button once again and select Convert template to PDF in the Generic module.
Select Contacts as the PDF template’s module and select the document template you just created in the Template field (see the picture below).
Email Template for the Cover Letter
The certificates are sent as email attachments. You can create the email cover letter for the certificate in Email Templates settings like all the other email templates (for more information, see Email Templates). The template can be created in any folder, a suitable one would be e.g. “Public”.
Creating the Module Tool
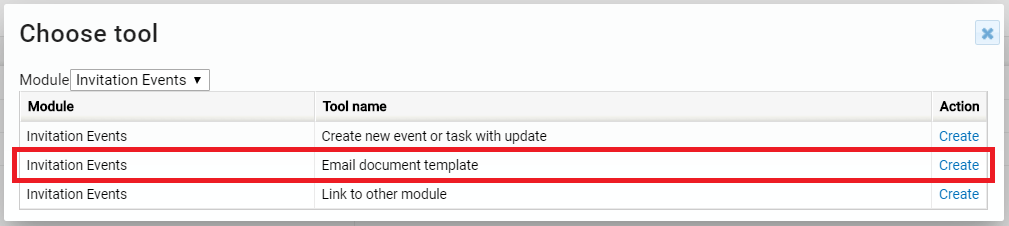
Once both the PDF template and the email template are done, you can create the module tool for sending the certificates directly from the invitation event. You can create the module tool in Settings → Module Tools.
The tool is created by clicking the Add Tool button and selecting the Email document template option in Invitation Events module (see the picture below).
The email template is selected in the field Email template and the PDF template for the certificate in Template 1 field (see the picture below).
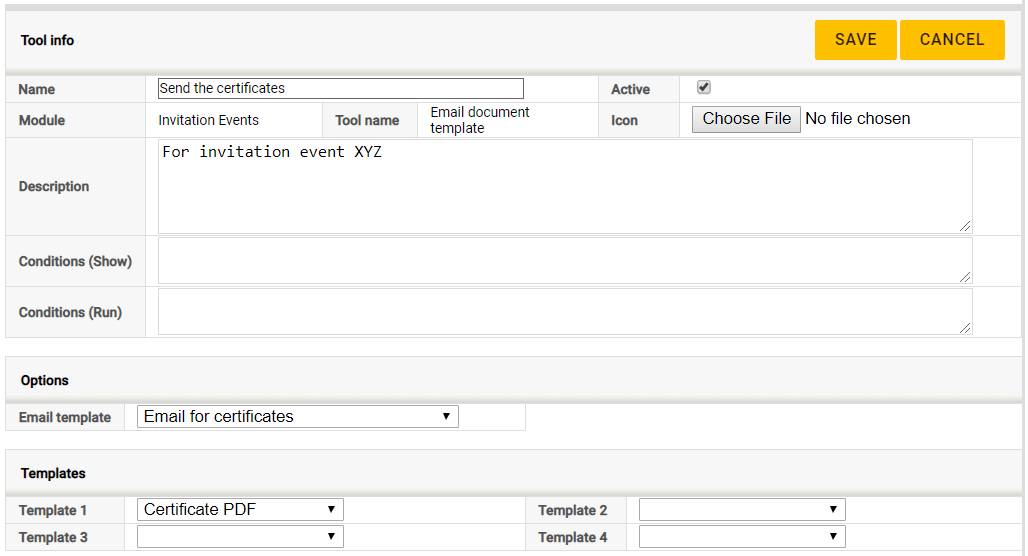
If the module tool is active, it is also available in the invitation event’s information view. You can use conditions in the Conditions (Show) field to make the tool visible to just one invitation event – for example a condition, that only shows the tool for the invitation event whose number is INE1, is written as follows:
{if $invitation_event_no != 'INE1'}eip{/if}
For more information about writing conditions, see Module Tools.