Introduction
In addition to listing filters, it is possible to create Kanban views in the general views of CRM modules.
Kanban is suitable for describing the process and its progress. Its visual presentation also often makes things easier to deal with and follow up. Any information that involves step-by-step progress can be represented as a Kanban. Kanban can be activated in any CRM module.
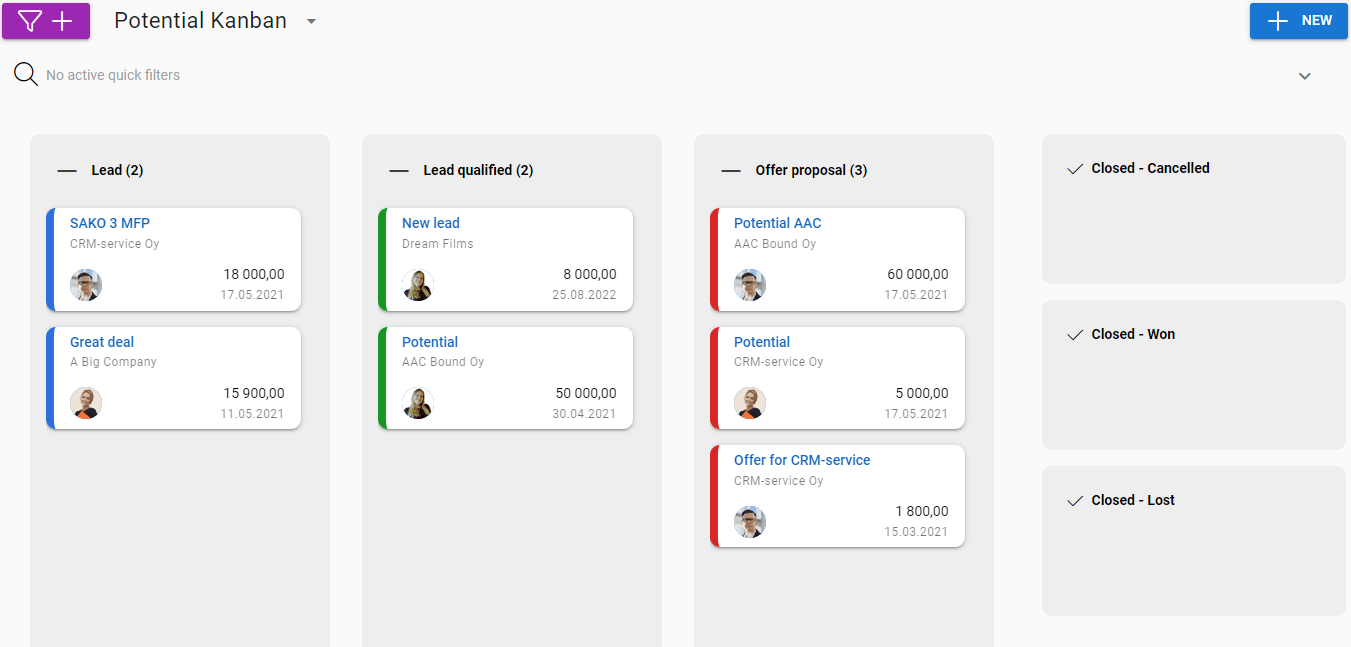
From the point of view of CRM, one of the most typical uses of Kanban can be, for example, the life cycle of a potential customer, in which case the view can describe potentials in the Potentials module according to the stage of their sales pipeline, from leads to completed deals.
Kanban not only enables entities (potentials, leads, activities, etc.) to be presented in stages but it can also be used to move cases from one stage to another easily by dragging.
Creating and modifying Kanban follow very much the same steps and principles as filters. There is more about creating filters in general, and, for example, defining a default filter, in the instruction Complete Guide to Filters.
Creating and Editing Kanbans
You can create a completely new Kanban by clicking the Create new -button ![]() in the upper left corner of the filter view of the module. The new Kanban is built based on the filter in use at the time, so if possible, you can first change the filter in use to a list/Kanban that already has the fields and/or conditions needed in the new Kanban.
in the upper left corner of the filter view of the module. The new Kanban is built based on the filter in use at the time, so if possible, you can first change the filter in use to a list/Kanban that already has the fields and/or conditions needed in the new Kanban.
First, the basic information for Kanban is defined:
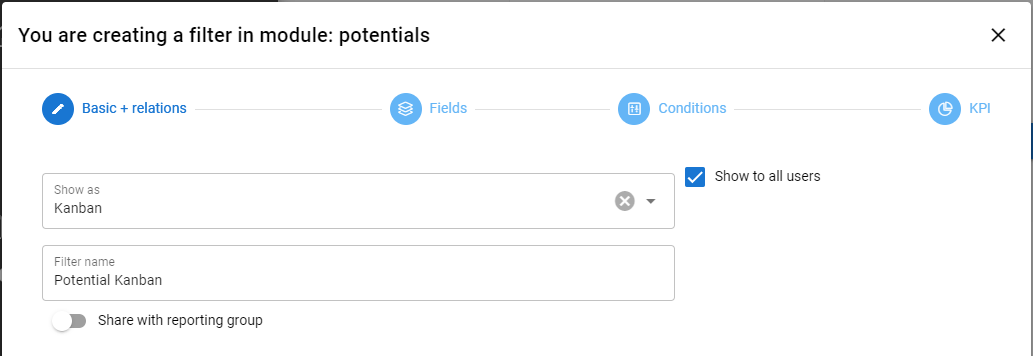
- Presentation method – Here the selection is Kanban.
- Filter name
- Show to all users – (admin only) The selection makes the filter public, so other users can also use it.
- Share to reporting group – (admin only) By turning on the setting, you can choose which reporting groups the filter will be shared with.
Fields
The Fields tab defines the presentation method and operation of Kanban in practice.
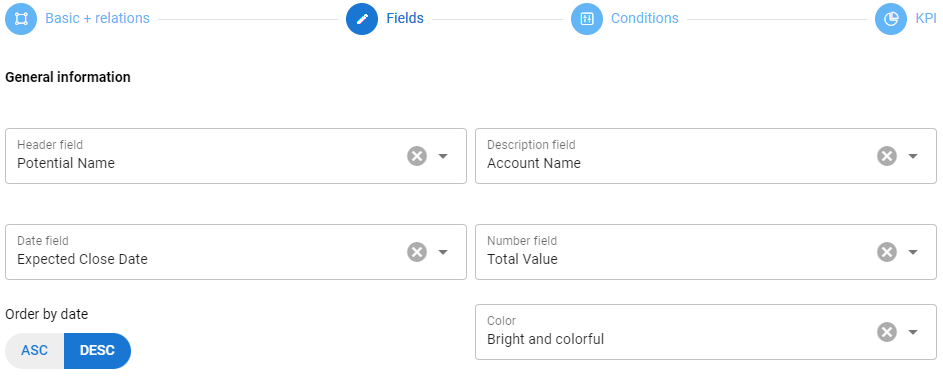
General information -the information below the header affects what is shown about the individual entity (in the case of the example picture, the potential) on the Kanban board. The following information can be specified:
- Header field – An identifier for a single entity. A name, subject, or something similar is usually the most effective.
- Description field – Can be used to identify the entity.
- Date field – The date displayed in connection with the entity. According to this field, it is also possible to define the listing of entities in Kanban either in ascending or descending order.
- Number field – Can be used to represent some numeric value of an entity on a Kanban board.
- Color – Kanban’s color scale.
Based on the given choices, the potentials are made into the following cards in the Kanban:

Create colums -The information under the title determines the process to be followed in Kanban, i.e. the columns shown in the view. This is done with the following choices:
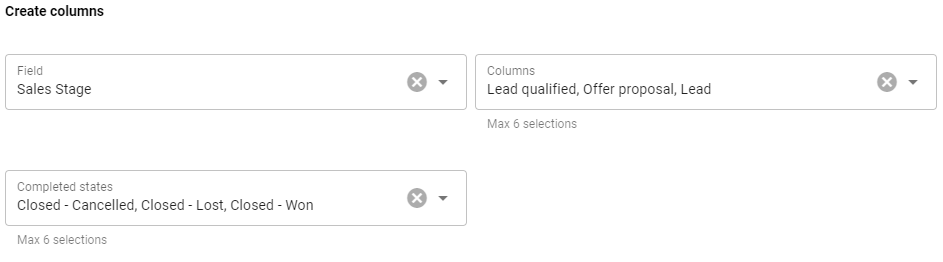
- Field – A list-type field that best describes the process to be followed. Usually, the most appropriate choice for this purpose is a status or stage field, such as the Sales stage used in the image.
- Columns – Those picklist values from the picklist selected for Field are used as Kanban columns. A maximum of six values can be selected as columns.
- Completed states – Among the values of the selection list selected in the Field section, values that are seen as decision states of the process can be selected in this section (in the example picture Closed, Canceled, Closed – Lost, Closed – Won). The last column in Kanban is formed from these choices. If an entity is dragged to one of these completed states, the state of the entity changes and it disappears from view in Kanban.
Conditions
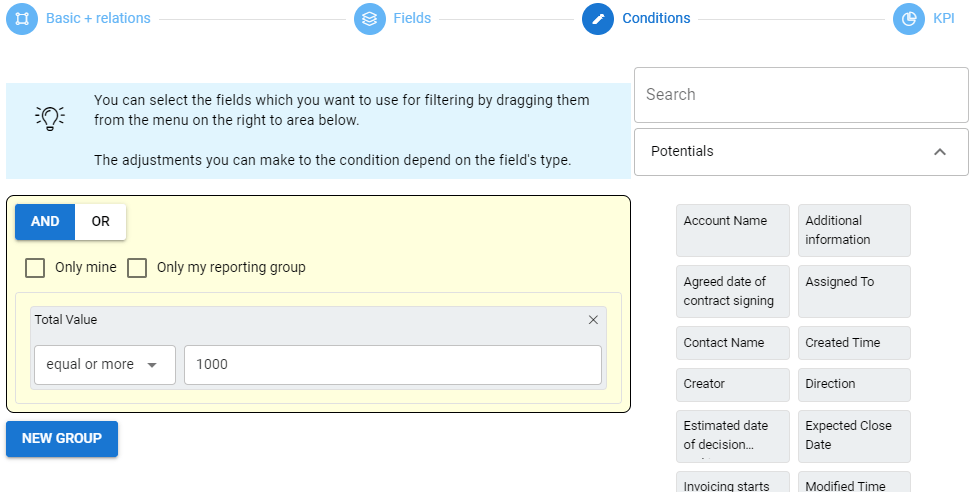
The next step is Conditions. Without Conditions, Kanban displays the entire content of the module in the view, but since it is only possible to display a maximum of 20 results in each column, it is often good to limit the set with Conditions. More details about creating conditions can be found in the Module filters.
Conditions are built in the same way as in list filters. In the example in the picture below, only those potentials whose number entered in the Total field is greater than or equal to 1000 are limited to Kanban.
KPI
As with the list filters, it is also possible to add 1-3 KPI reports above the Kanban view.
Result
An example Kanban formed by the selections of the images above is shown here: