General
Mass event triggers can be used to manage event-related automatic email communication to participants and contacts marked as personnel. The most typical triggers are registration confirmations sent to participants and a reminder about the event a few days before the event starts. This instruction describes examples of the above-mentioned cases, but these guidelines can also be used for understanding the function of triggers in general.
There can be several triggers per mass event, and if necessary, it is possible to define them separately for different roles of participants or personnel or in relation to different sub-events. Triggers are always event specific.
Email messages sent by triggers are created like other email messages in the Email Templates module. More details about creating email templates can be found in the instruction: Email templates: Creating emails.
Start
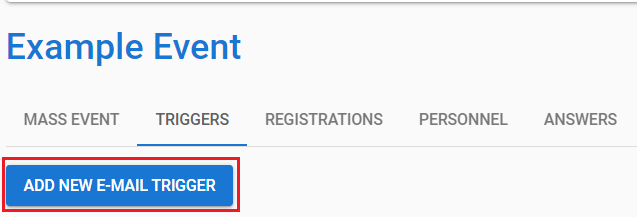
Mass event triggers can be maintained on the Triggers tab.
The view shows the triggers that have already been created for the event, and any user with rights to that event can edit and delete existing ones, as well as create new triggers, if necessary. The creation of a new trigger is started by clicking the Add new e-mail trigger button (see image below).-painiketta (ks. kuva alla).
A wide range of information can be specified in the trigger settings. Unnecessary fields are hidden from the creation area and the system automatically adds fields to the creation area based on user selections. The following information can be specified for the new trigger:
- Name – The internal name of the trigger – this is not visible to email recipients.
- Event – This is what triggers the trigger. In mass events, the most typically needed events are “After registration” and “Custom time”, which can be used to send e.g. reminders. In the latter case, the time of transmission must be determined by the conditions.
- Email Template – An email template that is sent.
- Target – The target audience for the email; in mass events, the recipients can be selected either by selecting “Registered person’s role” or by selecting “Staff’s role” at the event’s staff.
- Role – The registered person or staff roles to which the email is sent. You can choose one or more.
- Mass event / sub-event – By default, the trigger will touch all registrants of the mass event, but if necessary, this option can be used to limit the recipients of the message to only those registered for a certain sub-event.
- Active – Answers the question of whether the trigger is active or not. An inactive trigger does not send the email.
- Conditions – More detailed limitations for sending the trigger. If “Custom time” is selected as the trigger event, the sending time must be specified with a condition (see below Example: Reminder of the event the day before).
The example cases below deal with typical cases for sending registration confirmations and event reminders.
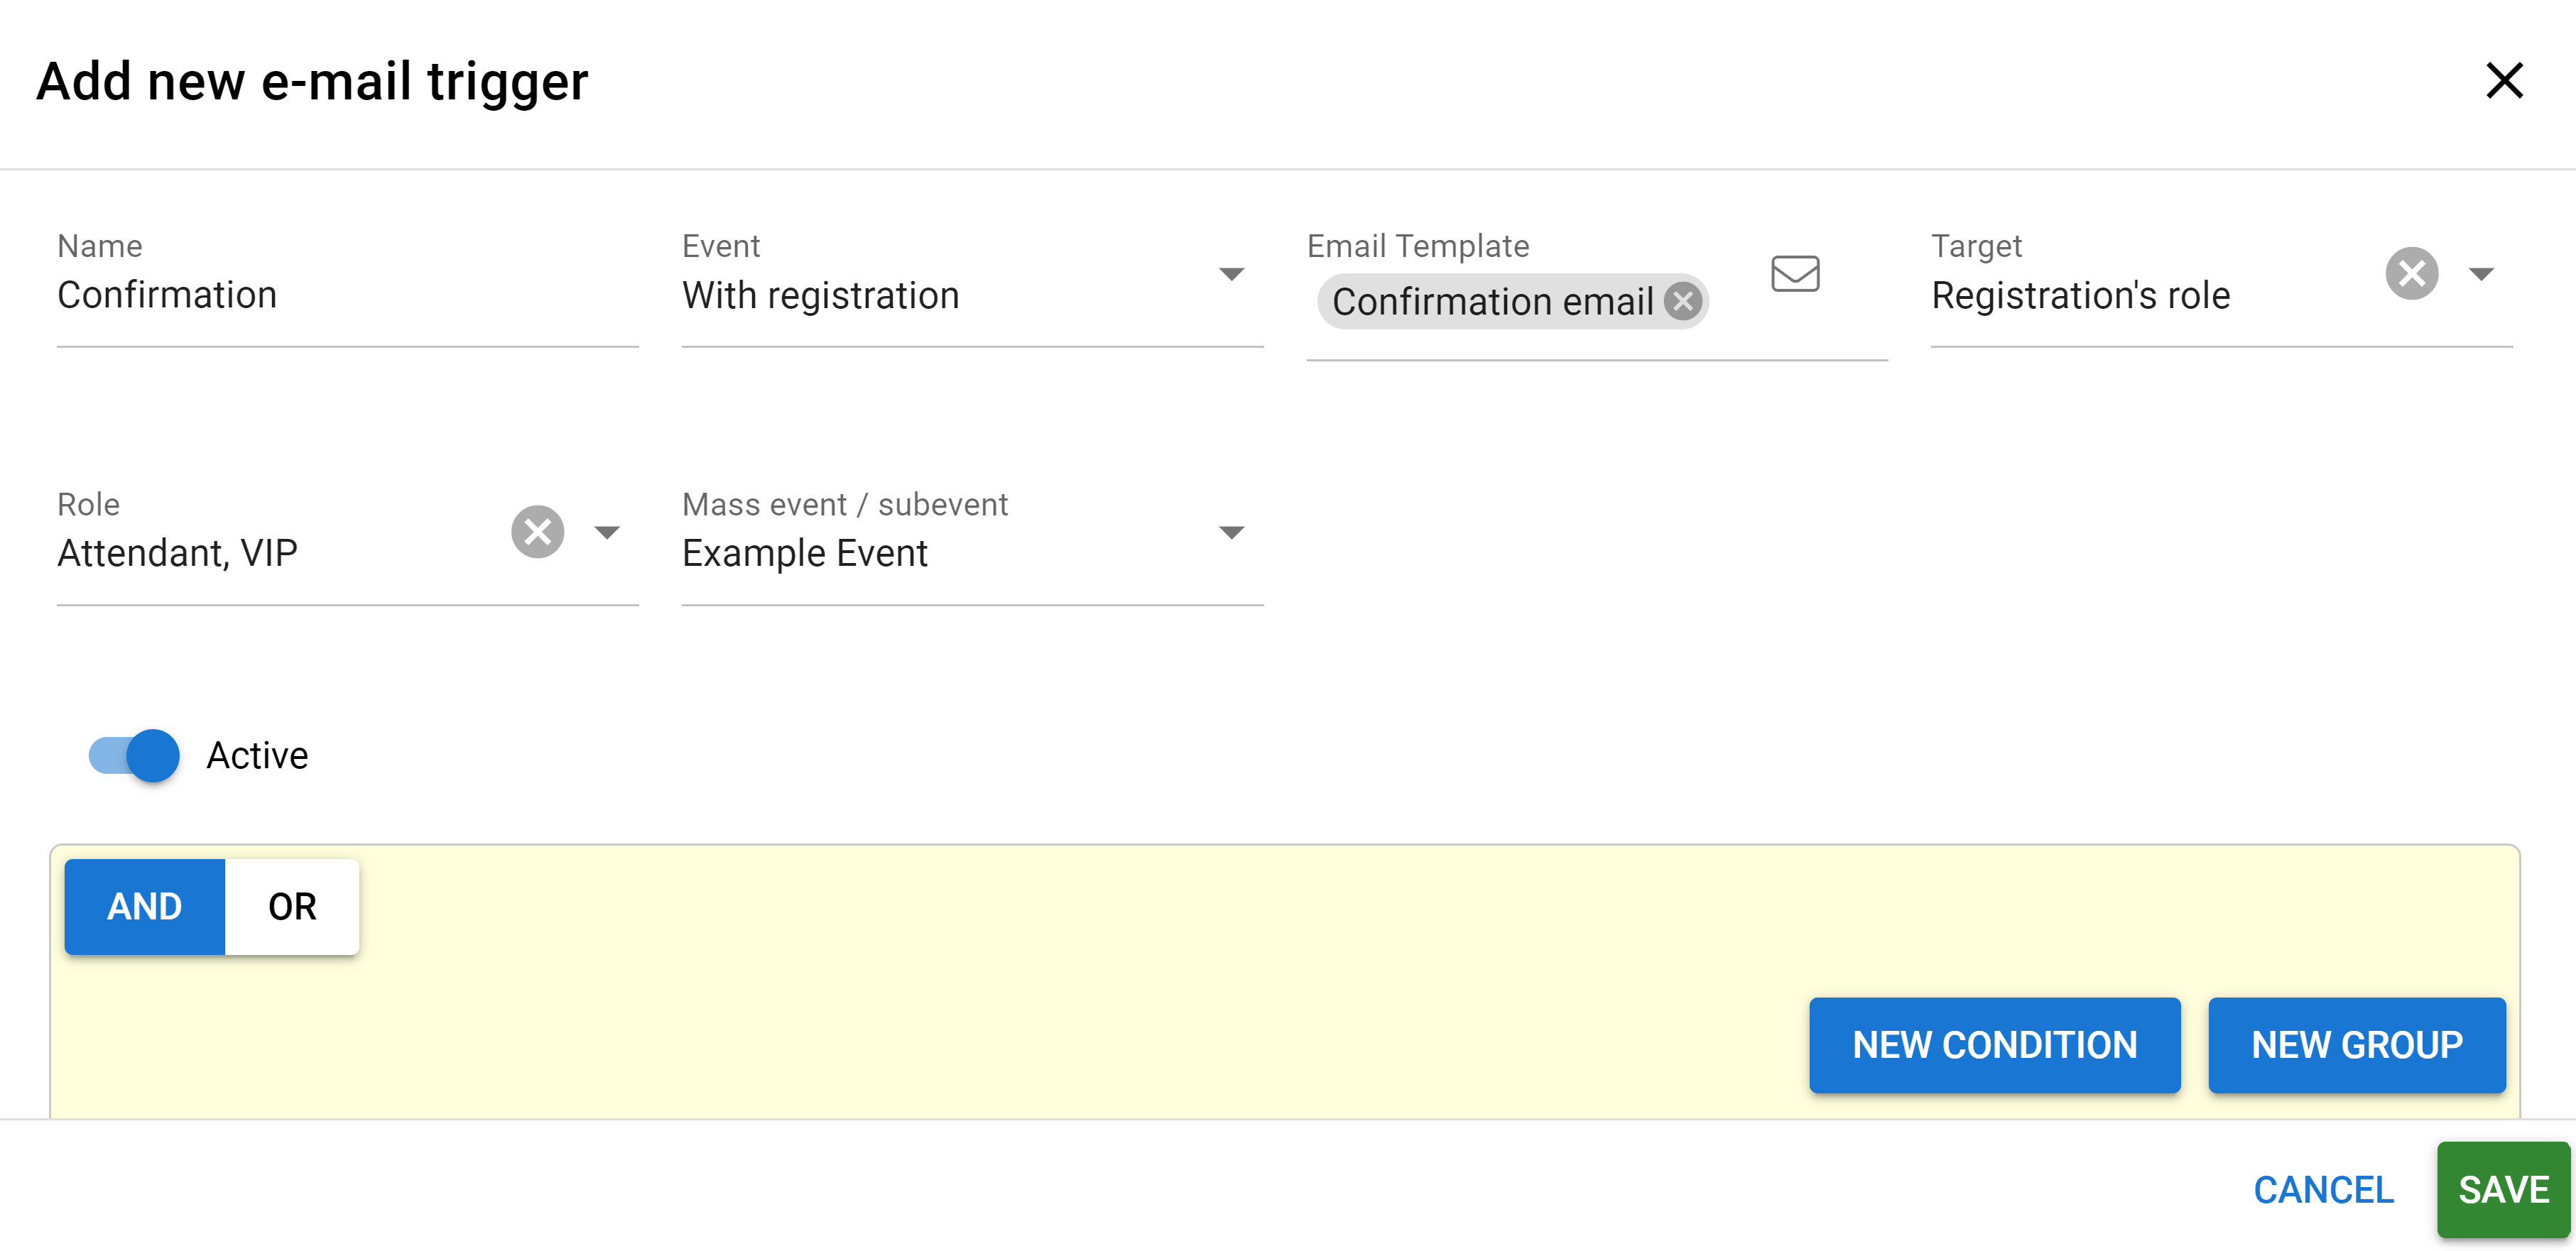
Example: Trigger for registration confirmation
We want to send a registration confirmation message to a new person who has registered for the event, regardless of the role the participant has signed up for. This can be done, for example, with the following choices (see also the image below):
- Name – Fitting name for registration confirmation.
- Event – Choose “With registration“, which refers to the moment when a new registration is received.
- Email template – Select the wanted email template.
- Target – Choose “Registration’s role“.
- Role – All roles are chosen.
- Mass event / sub-event – Here the whole event is chosen.
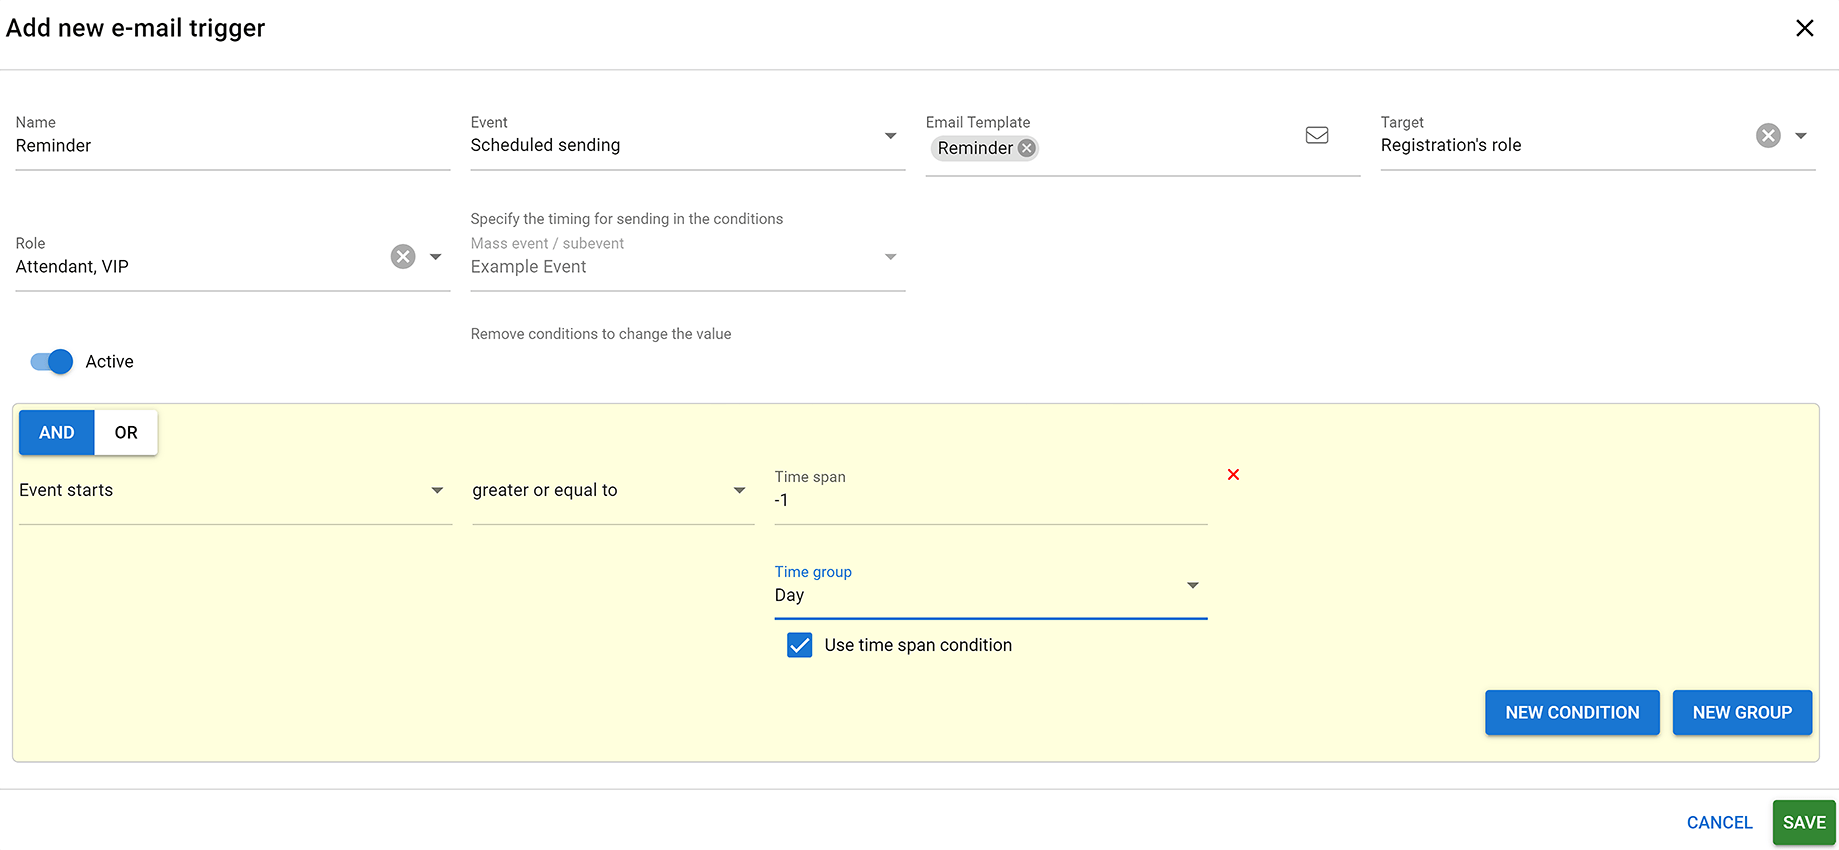
Example: A reminder of an event the day before
We want to send a reminder message to all those registered for the event one day before the start of the event, regardless of the role the participants have registered for. This can be done, for example, with the following choices (see also the image below):
- Name – Fitting name for the reminder.
- Event– Choose “Scheduled sending“. A more precise date will be determined by the condition
- Email template – Select the wanted email template.
- Target – Choose “Registration’s role“.
- Role – All roles are chosen.
- Mass event / sub-event – Here the whole event is chosen.
- Conditions – Sending time one day before the start of the event is defined with the condition “Event starts – Greater of equal to – -1 Day”. The last step of the condition can be changed to a time interval format with the “Use time span condition” option.