General
Filter conditions are set after setting up the fields of the wanted filter, and they limit the information shown in the list view. Please note that when using a field in conditions that contain a multi-relation, the system will give you the following notification:

Start
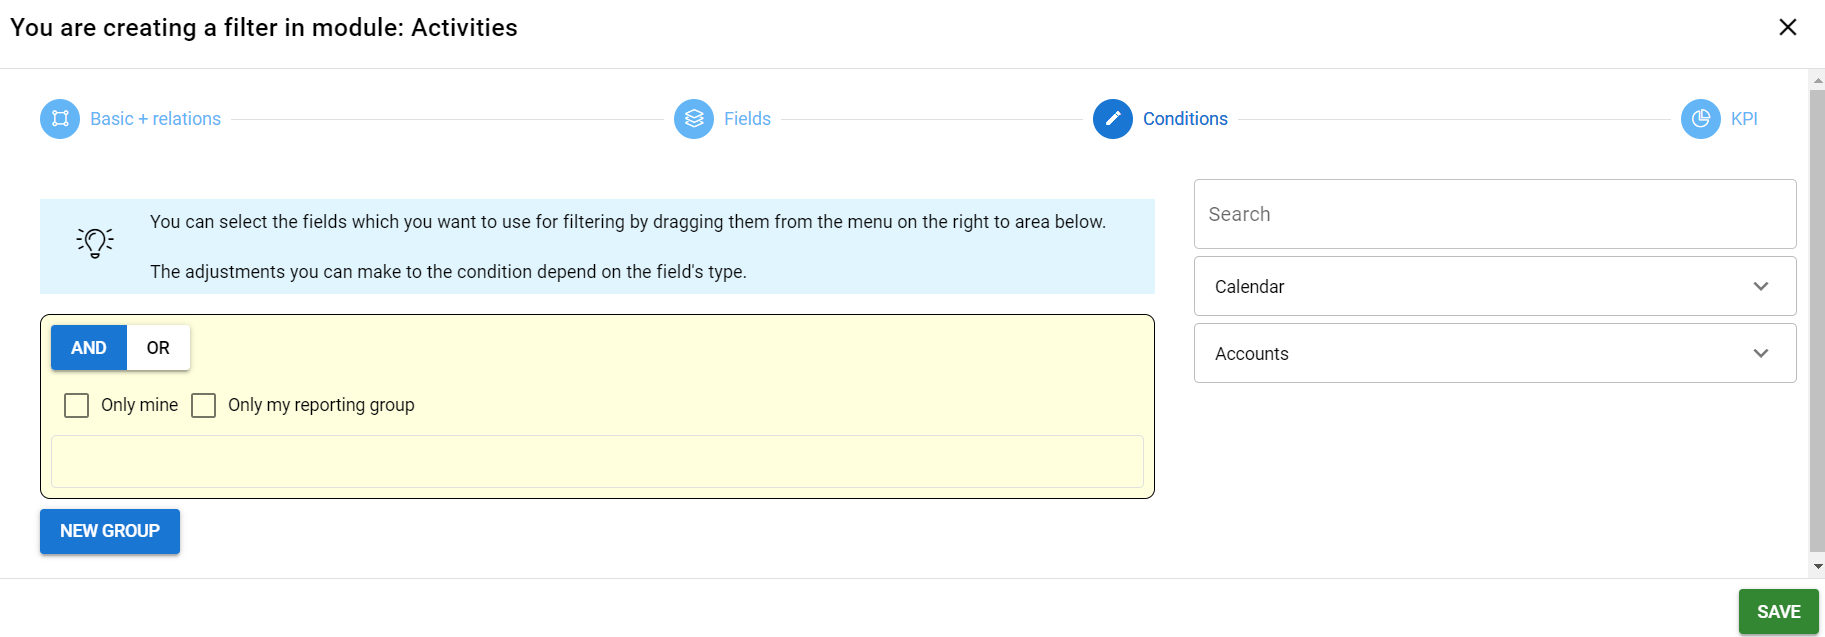
In the view where filters are created and edited, the field conditions are the third tab from the left. The field needed in a condition can be selected and dragged from the right-hand side of the view to the left-hand side.
Quick Start Guide
- Create/Edit the wanted filter.
- Fill in tabs Basic + relations and Fields.
- Go to the third tab called Conditions.
- Drag wanted fields from the right to the left side.
- Set up the wanted conditions to the selected fields and save.
Step-by-Step Guide
When creating or editing a filter, the conditions tab is the third tab from the left. Before creating conditions check that the first two tabs contain the proper information since the modules and fields determined on the first two tabs determine fields available in the condition tab.
Only mine and Only my reporting group options are an easy way to add conditions for the filter to show only the entities assigned to the user using the filter or their reporting group.
AND & OR

When you set up the filter conditions AND is automatically a default selection. You can switch between AND and OR by clicking them in the condition group.
NOTE: If it is necessary to use both AND and OR relations, you can use the New group button to create a new condition group. This way e.g. the first group can have AND relations between the conditions and the second one OR relations (see the picture below).
Operators
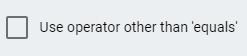
When you are setting up the conditions, the available operators are determined by the type of field you are using. Here we cover the details of the available operators. In many cases, the default operator is ‘equals’, which is used to find the exact match. The counterpart of default is Is not, which is used to find all other entities except the exact match. Available operators can be found by checking the box under the filter condition text box (see picture below).
When the box is checked, you will receive a picklist that shows you all other available operators except equals. Equals can be re-selected by unchecking the box. If the box is not visible, it means that the field type does not support these kinds of operators. Next, we list the most common types of operators in the fields.
Number field operators
Number field operators are Equal (default operator), is not, lesser, lesser or equal, more, and equal or more. In this example, we use the number 1 as the number used in the operator field. So, using this example the conditions would give results like these:
- Equal gives all the entities that have the number 1 in the selected field.
- Is not gives all the entities that have any other number than number 1 in the selected field.
- Lesser gives all the entities that have a number lower than 1 in the selected field.
- Lesser or equal gives all the entities that have the number 1 or lower in the selected field.
- More gives all the entities that have a number higher than 1 in the selected field.
- More or equal gives all the entities that have the number 1 or higher in the selected field.
Text field operators
Text field operators are Equal (default operator), is not and contains. For this example, we are looking at product names, so let us pick a name Testproduct and see what the filter gives us in the following conditions:
- Equals gives the product that is named Testproduct exactly. This means that Testproduct 1 will not be listed when using this option.
- Is not gives any other products except the product that has the exact name Testproduct. So, the Testproduct 1 will be listed when using this option.
- Contains lists all products that have Testproduct somewhere in their name. So, both Testproduct and Testproduct 1 will be listed when using this option.
- Not contains lists all products that do not have the text Test Product as a whole anywhere in their name. So Test Product and Test Product 1 would not appear in the search, but for example, Product and Testing Product would appear.
Picklist operators
Picklist operators can be used to filter different picklist options. Picklist fields do not let you write into the condition field freely. Instead, you must select which picklist values you want to use in the conditions and then select do you want entities equal or not equal to selected values (‘equal’ and ‘is not’ options). You can also select the options ‘is empty’ and ‘not empty’. Those options deselect the picklist value option and instead, they just show if the field has no value (is empty) or if it has any value (not empty).
Date field operators
Date field operators allow users to filter out entities by using the wanted time conditions. Conditions are divided into four parts:
- Current
- Last
- Next
- Custom
Current time settings are current Year, Quarter, Month, Week (Mon-Sun) and Day. Let’s have a look at the example, where we want to see entities created in the wanted time. The date filter is used will be Wednesday, April 3rd, and the results will be as follows:
- Year will show all entities created between 1.1.2024 and 3.4.2024.
- Quarter will show all entities created between 1.4.2024 and 3.4.2024 since Q2 started 1.4.2024 and entities before that belong to the previous quarter.
- Month will show all entities created between 1.4.2024 and 3.4.2024.
- Week (mon-sun) will show all entities created between 1.4.2024 and 3.4.2024 since April 1st was a Monday.
- Day will show all entities created on 3.4.2024, which is the current day in this example.
Last time settings are last Year, Quarter, Month, Week (Mon-Sun), 7 days and Day. Let’s have a look at the same example, where we want to see entities created in the wanted time. The date filter is used will be Wednesday, April 3rd, and the results will be as follows:
- Year will show all entities created between 1.1.2023 and 31.12.2023.
- Quarter will show all entities created in Q1, meaning days between 1.1.2024 and 31.3.2024 since Q2 started 1.4.2024.
- Month will show all entities created between 1.3.2024 and 31.3.2024.
- Week (mon-sun) will show all entities created between 25.3.2024 and 31.3.2024 since the current week started Monday, April 1st.
- 7 days will show all entities created between 28.3.2024 and 3.4.2024 since the last 7 days are calculated as the current date + 6 days before the current date.
- Day will show all entities created on 2.4.2024.
Next time settings are next Year, Quarter, Month, Week (Mon-Sun), 7 days and Day. Let’s have a look at the example. Since we cannot create entities in the future, let’s filter planned activities that are starting at the wanted time. The date filter is used will be Wednesday, April 3rd, and the results will be as follows:
- Year will show all planned activities starting between 1.1.2025 and 31.12.2025.
- Quarter will show all planned activities starting in Q3, meaning days between 1.7.2024 and 30.9.2024 since Q2 started on 1.4.2024 and ends on 30.6.2024.
- Month will show all planned activities starting between 1.5.2024 and 31.5.2024.
- Week (mon-sun) will show all planned activities starting between 8.4.2024 and 14.4.2023 since the current week ends Sunday, April 7th.
- 7 days will show all planned activities starting between 3.4.2023 and 9.4.23023 since the next 7 days are calculated as the current date + 6 days after the current date.
- Day will show all planned activities starting on 4.4.2024.
Custom is the date option that can be used when Current, Last and Next just don’t fit the wanted criteria. Here is a quick explanation for each available option:
- Time Range will allow you to select two dates and the filter will show all entities that match the set date. For example, if you select Created time and time range 1.1.2024-3.4.2024, you see all the entities that have created time between these two dates.
- Time span allows you to select a specific timespan for the date. The present is marked as 0, the previous is set by selecting a negative number and the future dates are selected using positive numbers. Since the present is 0, it is always included in the calculations (examples below). The example date is again 3.4.2024 and we are filtering planned events.
- Year -1 will show planned events in 2023 and 2024, while year +1 will show events in 2024 and 2025.
- Quarter: -1 will show planned events happening in Q1 and Q2 (1.1.-30.6.2024), while quarter +1 will show planned events happening in Q2 and Q3 (1.4.-30.9.2024).
- Month: -1 will show planned events in March and April, while +1 will show planned events in April and May.
- Week (mon-sun): -1 will show planned events happening between dates 25.3.2024 and 7.4.2024, while +1 will show planned events happening between dates 1.4.2024 and 14.4.2024.
- Day: -1 will show planned events happening in 2.4.2024 and 3.4.2024, while +1 will show planned events happening in 3.4.2024 and 4.4.2024.
- Time span (past/future) works like Time span. The only difference between these two is that you select both past and future date adjustments. So, for example, if the date is set -1 in past and +1 in the future and the current date is 3.4.2024, the filter will show entities that have date between 2.4.2024 and 4.4.2024 in the field used in conditions.
- Empty value shows all the entities that do not have any set date in the field used in conditions.
- Has value shows all the entities that have any date value set in the field used in conditions.
- Single date shows all the entities with this specific date set in the field used in conditions.