General
Campaigns in CRM can be used for many purposes. At their simplest, campaigns can be used to plan customer lists, but you can get more out of them when managing newsletter lists. Campaigns are also used to define the contacts in the Contact Portal call campaigns.
This guide focuses on advanced use of these entities. To learn more about how entities behave in CRM in general, see the basic guide for entities.
The most efficient way to work with campaigns is to create light automation that automatically keeps the campaign up to date.
Location and layout
Campaigns is a customisable module, so there is no fixed name or location for it. Campaigns use a basic list view where the controls available depend on the user’s permissions.
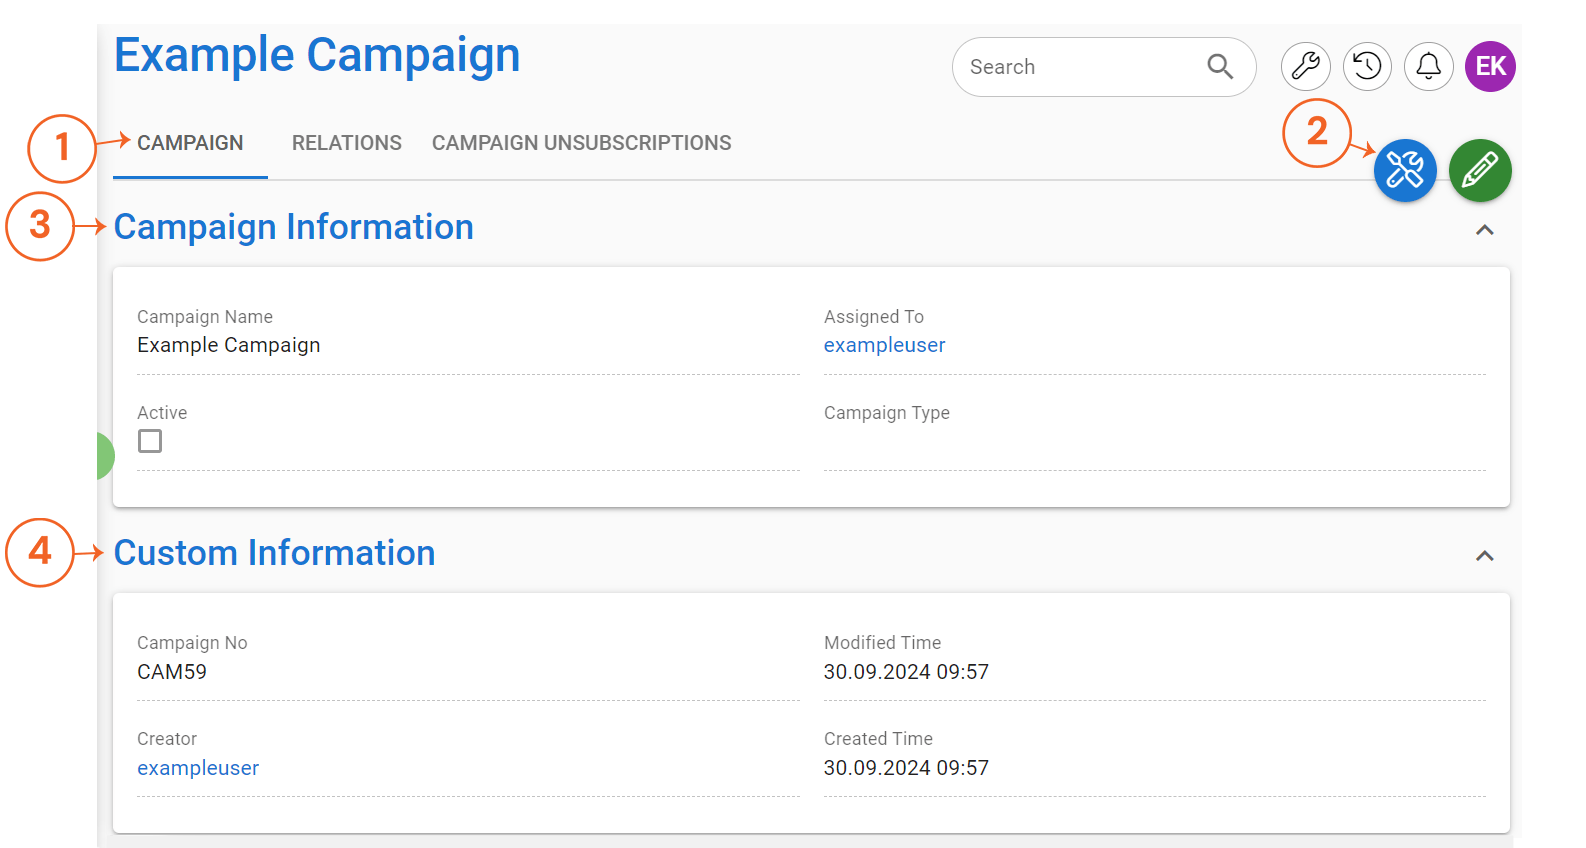
In its most basic form, the campaign only needs a name, but these campaigns have very limited functionality. For this reason, we will use an email campaign as an example in this guide to demonstrate the settings required for more complex campaign functionalities. With this in mind, let us look at the Campaign entity card and its basic functions.
- Tabs give the user a structured view of the campaign. The fields and blocks displayed depend on the user’s permissions.
- Campaign tab displays basic information about the campaign.
- Relations tab displays the contacts associated with the campaign. Contacts can be added, deleted and accessed from this tab.
- Campaign unsubscriptions tab shows which contacts have unsubscribed from the campaign. This tab is not always visible as there may be no information to display and the information displayed here is read-only.
- Module tool & Edit buttons are used to edit the campaign information, delete the campaign or use various module tools that the system has to offer.
- Campaign information block contains a detailed view of the campaign. At minimum, this block has Campaign Name and Assigned To fields, but for email campaigns, we also need to use Active and Campaign Type fields.
- Custom information block is mostly used for read-only information, but it can contain other fields depending on the system settings. The most commonly displayed information includes Campaign No, Created/Modified Time and Creator.
Creating a new campaign
You can create a new campaign by going to the Campaigns module and pressing the New button in the basic list view. Required information is determined by system settings. There may also be many other fields in the Campaign Information that should be filled in, depending on the campaign and its purpose. Once the required information has been entered, the user simply presses ‘Save’ and the campaign is created.
Required fields when creating an email campaign
To work properly, email campaigns need two more mandatory fields than basic campaigns, called Active and Campaign Type. This is because when you use Mass Mailing, the Select Campaign option will only show email-type campaigns that are marked Active. So, a working email campaign in its most basic form looks like this:
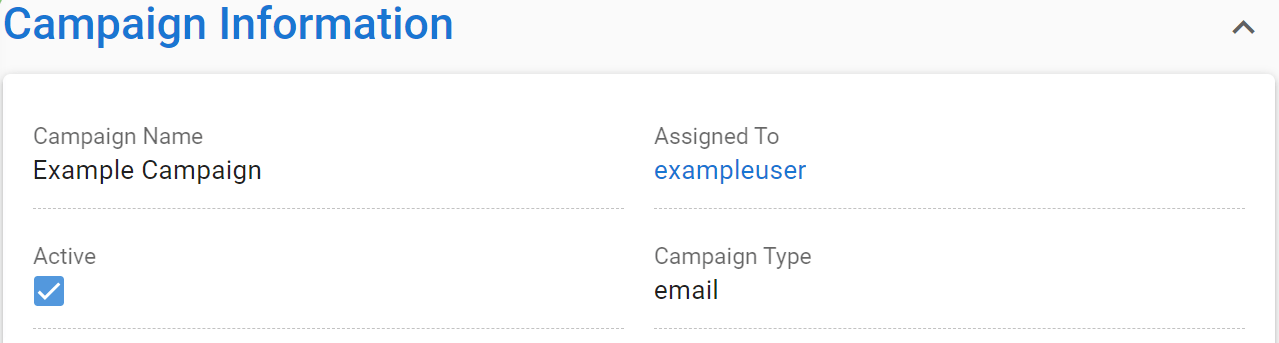
The Campaign Type field is a picklist that contains the default campaign type ‘Email’ for mass mailing purposes. The field may have a different name depending on the system’s Picklist Editor settings. Depending on the system settings, the picklist can also contain other types. Only the Email type campaigns can be used in mass mailings.
Adding Contacts to Campaign
You can read about adding contacts to the campaign in the guide Campaign segmentation.