General
E-invoicing is an efficient form of billing for both the biller and the consumer. If e-invoicing is enabled for consumers through CRM, it is good to ensure that customers are also aware of how they can subscribe to sending invoices to their online banking if they wish. This guide describes an example of how to send automated email instructions to contacts interested in e-invoicing to order e-invoices. The situation is described from the perspective of the association, and people who become members of the association can indicate on the membership form that they are interested in receiving their membership invoices as e-invoices. Of course, it is also possible to send a similar message manually as an individual mailing without automation.
The customer must receive one invoice sent via CRM, either in paper form or by e-mail, in order to subscribe to e-invoices in the future. To order an e-invoice, the customer always needs the reference number of the previous invoice and another identifier, such as a contact number.
Field: Contact interested in e-invoicing
In the example in this guide, a contact, i.e. a new member of the association, can indicate their interest in subscribing to e-invoices by filling in the membership application form. We have created a custom ”Requested e-invoice” field for this purpose. The field on the membership application form automatically populates the ”Requested e-invoice” checkbox on the CRM contact card, which also triggers the automated sending of the email (see below under Creating a workflow). For more details on the creation of fields, see Layout Editor.
Preparation of the email template
The automatically sent email template is defined in the Email Templates module, like any other email in CRM. For more detailed instructions on how to build email templates, see Email Templates.
The email’s graphic design and wording should reflect the organisation’s branding. The image below shows an example of the text in an automated email when a contact has expressed an interest in receiving the association’s membership invoices as e-invoices when joining as a member.
Subscribe to receive your membership invoices as e-invoices!
You will receive your first membership invoice from us by letter. To receive subsequent invoices from us directly to your online bank account, follow the instructions below:
- Pay your first invoice using the information on the letter invoice.
- Log in to your online banking and go to subscribe to your new e-invoice. If necessary, please check your bank’s instructions for ordering e-invoices.
- Search for the biller ”Association X”
- Add your identification details, i.e. the reference number and customer number of the letter invoice you paid.
Creating a workflow
The workflow for sending an email template can be implemented using workflows under Settings → Workflow. Workflow settings can also be accessed via the settings in the Contacts module.
To create a workflow, start from the top right corner of the view by clicking on the New Workflow button and selecting Contacts as the module.
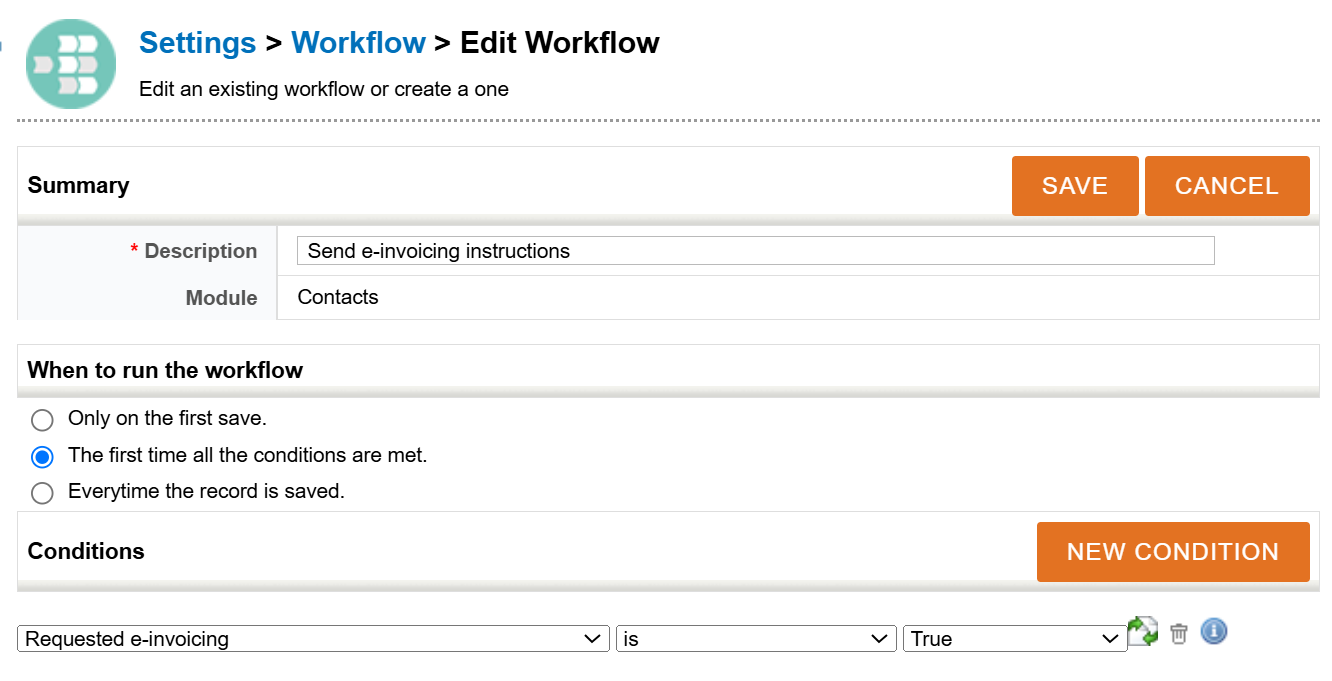
The first step is to define the following information for the workflow (see picture below). For more information on the general configuration of the workflow, see Workflows):
- Description – Workflow name.
- When to run the action – Specifies when the workflow will be run. E-invoice order instructions are only to be sent to the same contact once, so the most appropriate option is ”The first time all the conditions are met”.
- Conditions – The rules under which an email will be sent to the contact. For example, in the image below, contacts have the field ”Requested e-invoicing”, and the instructions to order an e-invoice will be sent if it is enabled for the contact.
Save the workflow after configuring the above information.
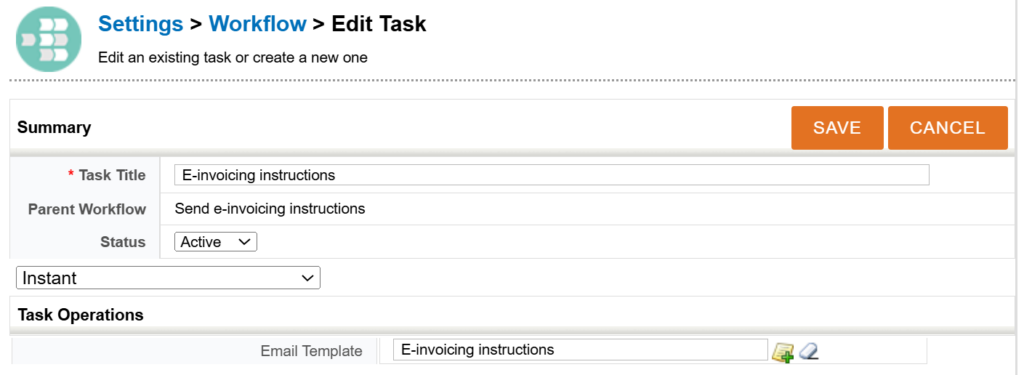
The Tasks section will appear after the first save of the workflow. The action to send an email template is done by clicking on the New Task button and selecting ”Send Email Template”.
A name is defined for the action and it is ensured that it is active. A delay can also be defined for the action if required. Finally, in the Email Template field, the email template prepared in the previous step is selected (see picture below).
The automation is active as soon as the action is saved.