General
An entity or a record is a single piece of data stored in a system, e.g. a single account, product or quote. Users can own, view and manage entities. Each entity has a single owner, which can be an individual user or a group.
Entities also allow data relations to be clearly represented. For example, a company may have multiple contacts, each of which is clearly visible on the company’s entity card, and the entity card for each individual contact can be opened separately for viewing.
In addition, the entities serve as a basis for customisation and extensibility of the CRM system. Organisations can create customised entities to meet their needs, processes and associated data requirements.
The entity card
Entity cards are presented in different modules as a list view that can be managed using filters. For more information on this topic, see Complete guide to filters. The desired entity is opened for viewing by selecting it from the list view of a module.
An entity card is a record view of a single entity. For example, a contact’s entity card displays the data set associated with the contact, such as the contact’s contact information. The information displayed on the entity card is affected by both system settings and user rights. The settings and permissions also affect the tools available to the user for each entity.
In principle, an entity card consists of the following elements:
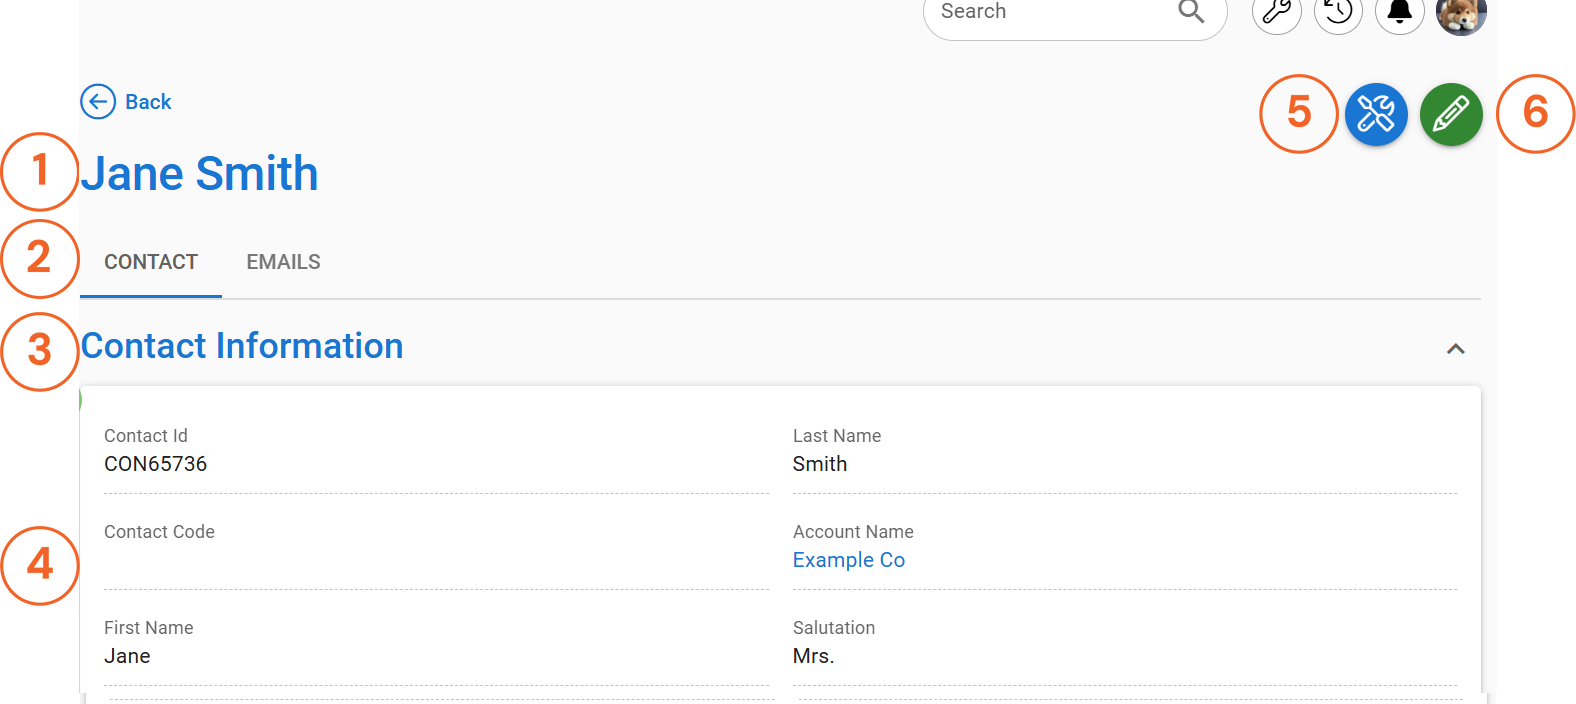
- The entity name, which in the case of the example image consists of the first and last name of the contact since both are known.
- Entity tabs are displayed immediately below the entity name when available. The active tab for which data is visible is underlined.
- The block title indicates to which data section the data in the block below belongs.
- The block displaying the entity information. The block often contains fields to be filled in, but the content may also be a chart, a change log or list of relations, for example.
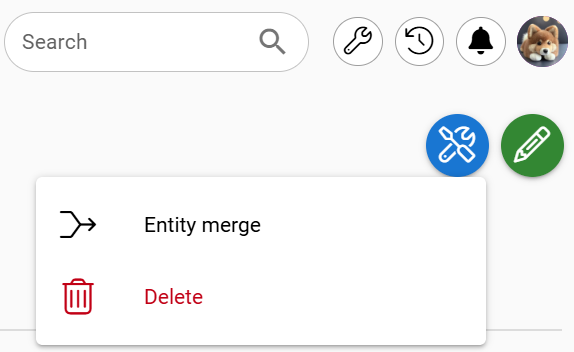
- Behind the module tool icon, the user will find tools related to the entity in question, such as a delete button for the entity.
- The Edit icon opens the entity in the editing mode of the entity card, allowing its data to be modified.
Creating an entity
A new entity is created in the traditional way by going to the desired module and selecting the +New button in the top right corner. Pressing this button opens a pop-up window where the entity data is entered. The pop-up window contains the following basic elements:
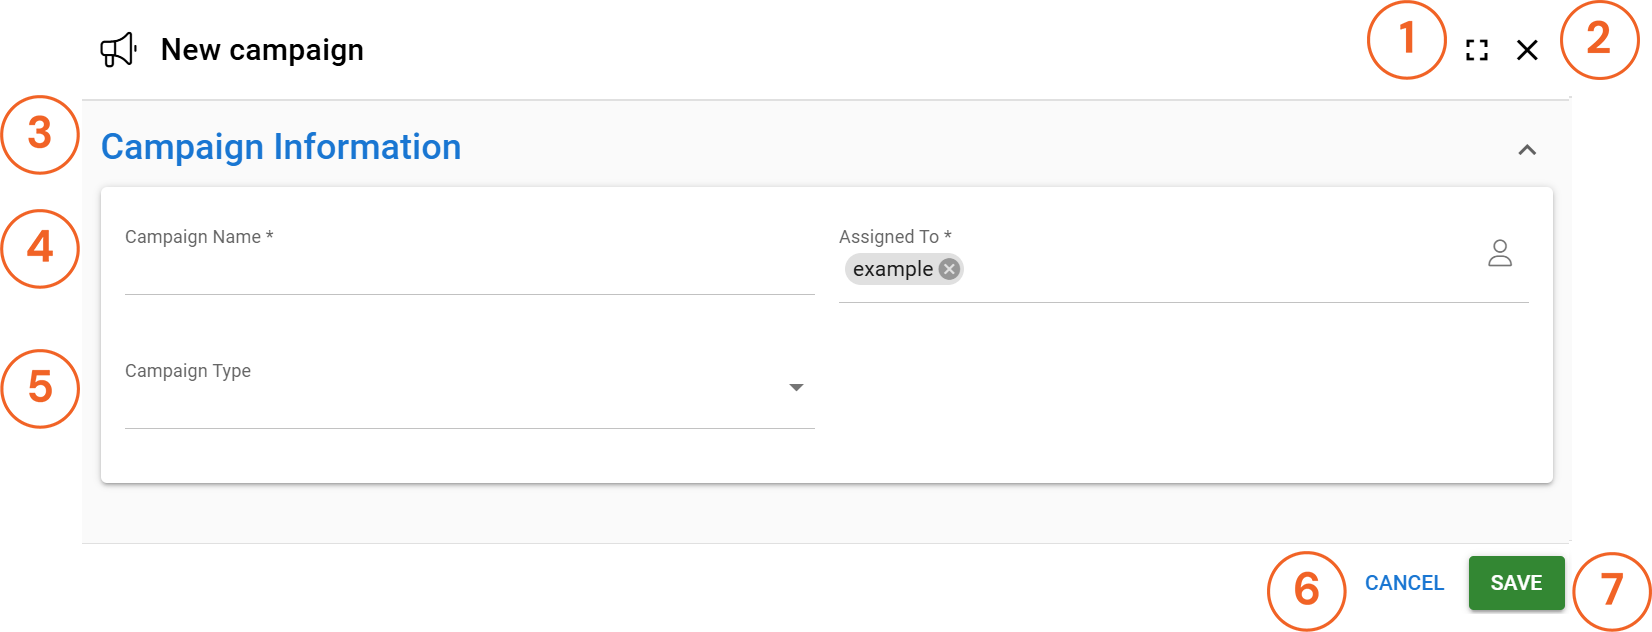
- The Expand/Minimize icon expands the shortcut to a full screen view or minimizes the full screen view.
- The X button closes the creation screen without saving any data.
- The block header indicates to which block of the entity the field data belongs.
- Mandatory fields are marked with an asterisk *.
- If the user wishes, they can also fill in data in other fields during the creation phase.
- The Cancel button closes the window without saving the data.
- The Save button saves the entity and closes the creation window.
If not all required entities are filled in when the record is saved, the user will be presented with a Check Entities pop-up window showing the required entities that the user has left blank during the creation phase. The same pop-up window will also display fields whose content does not match the validation rules set for the fields.
For example, if an email field does not contain the correct address format and the user ignores the instructions given by the field, the field will be brought up in the Check the information in fields pop-up which will prevent the entity from being saved until the user has filled in the required fields and the information in all fields is in the format required by the system settings.
Minimizing and expanding the entity creation view
The user can choose between two different views for entity creation, a quick view and a full screen view. The shortcut view displays the mandatory fields of the entity as well as the fields that have been set in the creation shortcut view in the system settings. In the full screen view, all fields and tabs of the entity are already visible at the creation stage.
If it is not possible to enter data in a single field at the creation stage, the field is hidden and marked with the text ”This section is available after the first save”.
The system automatically remembers the user’s last creation view size selection, but the size of the view can always be changed if necessary using the Expand/Resize button.
Completing entity data via a relation
Entities often contain relations – for example, a contact may have an organisation that appears as a relation field on the contact’s record card. By clicking on the relation field, the user can start a search that looks for entities ”containing” the condition.
When the user clicks on the relation field icon, a pop-up window appears, listing the available entities. If the desired entity does not exist in the system, the user can add a new entity by pressing the +New button in the top right corner of the list, which opens the entity creation screen.
Placeholder
CRM also has a field called Placeholder. It does not require any settings; you can simply place it where you want on the entity card. This field then reserves an empty area on the entity card at the point where it is placed (see picture below). In our example image, the placeholder is located between the first name and contact number fields.
To delete an entity
In addition to adding entities, users may also have the right to delete entities from the system. In this tutorial we will deal with the deletion of entities in the traditional way, but it is worth noting that for example using the Merge entity module tool will delete entities from the system.
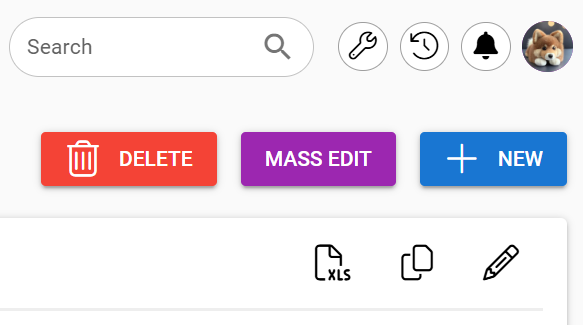
Deleting one or more entities can be done directly in the list view of the module. If one or more entities are selected and the user has the right to delete entities, the Delete button will appear alongside the other buttons for managing entities in the module.
An individual entity can also be deleted from the system via the Delete button located under the Module Tools button on the entity card.
Entities deleted via the Delete buttons are moved to the system recycle bin. Users who have access to the recycle bin can, if necessary, restore the deleted file using the Restore button for a period of 30 days after the entity has been deleted.