General
The CRM service’s Self-Service Portal includes oAuth 2 interfaces so that authentication from different third-party systems can be performed against CRM contacts. The oAuth 2 implementation supports the OpenID Discovery Protocol, and CRM admin users have the right to manage oAuth 2 applications in the Self-Service Portal settings.
Start
OAuth settings are changed in the Self-Service Portal settings, where you will find the oAuth applications menu next to the site settings in the top menu. If no oAuth applications are available, the list in the view that opens will be empty, and you can add a new application by clicking the New application button.
Basic View
If even one application has been added to the oAuth settings, the oAuth applications settings view will contain the following sections:
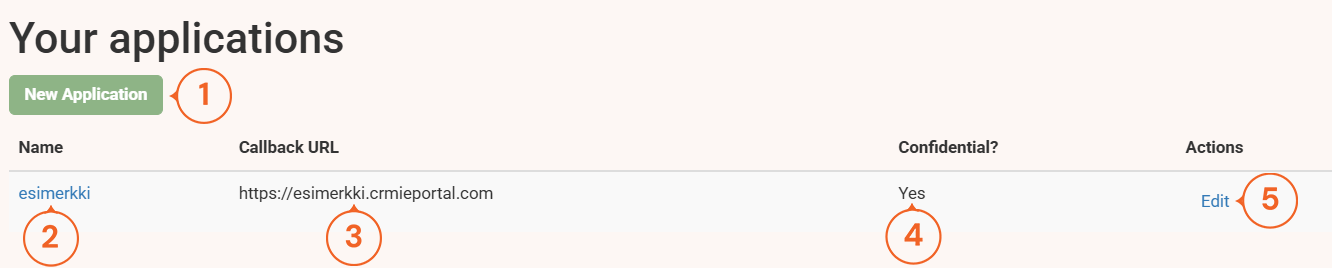
- The user can add a new application by clicking the New Application button.
- The Name column contains the names of the applications added to the system. By clicking on a name, the user can obtain more information about the application.
- Callback URL is the web address to which the user is directed after successful oAuth authentication.
- Confidential indicates whether the application’s security level is sufficient to store customer data securely. Secure applications include web applications running on a server, while mobile applications are considered insecure.
- The Actions column contains an edit button, which allows the user to edit the selected application and delete it if necessary.
Adding a New Application
To add a new application, click the New Application button. Adding settings for a new application and editing settings for an existing application are done in the same view. The view consists of the following parts:
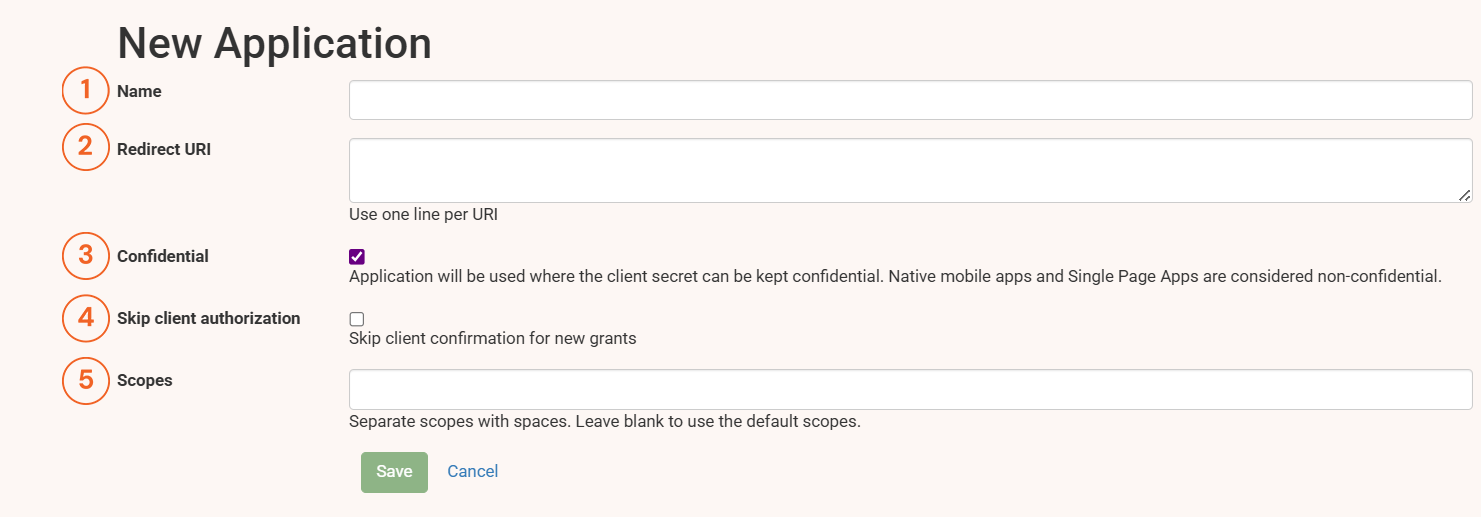
- Name is the name given to the application
- Redirect URI is the location to which the user is redirected after successful authentication, for example https://yourportal.crmieportal.com/
- By checking the Confidential box, you can specify that the application is secure enough to handle confidential information.
- By checking the Skip client authorization box, you can skip the notification window asking the user for permission for the third-party portal to read the user’s profile. If the application is completely trusted, you can enable this feature.
- Scopes defines which resources the application is allowed to access. The supported values here are read, openid, profile, and email.
Application Information View
In the application information view, the user can see all information relevant to the application. In addition, the user can edit application information and delete the application from the information view. The application information view consists of the following parts:
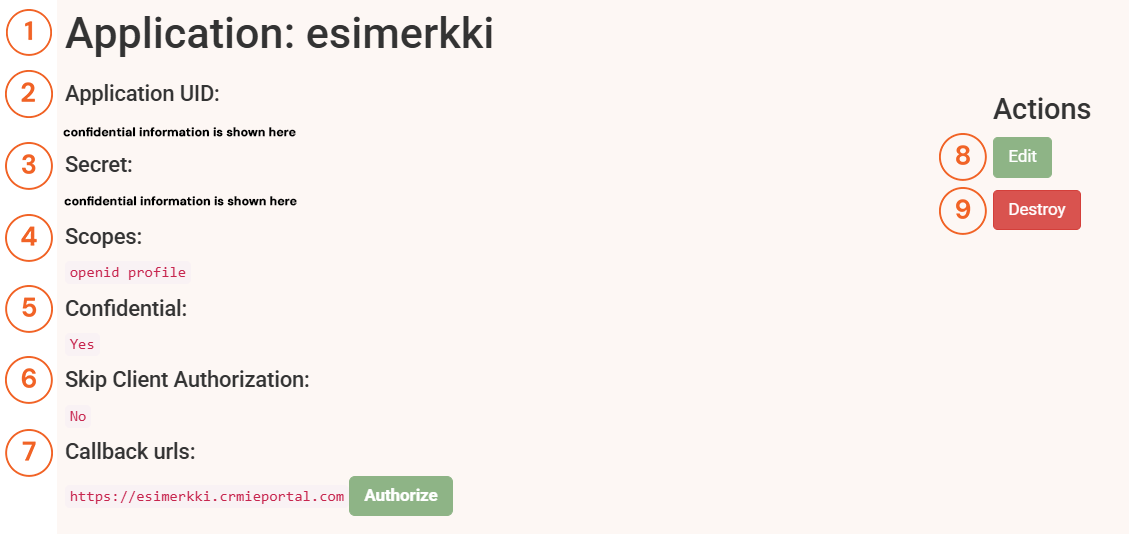
- First, you will see what is the application in question.
- This shows the Application UID – this is confidential information that must not be shared via unsecure channels such as email!
- This shows the application’s Secret – this is confidential information that must not be shared via unsecure channels such as email!
- Scopes tells you what information will be shared with the application.
- Confidential determines whether the application can be trusted with sensitive information.
- Skip Client Authorization determines whether the user is asked for confirmation before sharing information.
- Callback urls tells where the user is directed after successful authentication.
If confidential information is transferred elsewhere, it must be done in parts and using a reliable channel.