General
CRM users can edit their own data through the profile view. Users can edit their profile picture and contact details, among other things, directly from the main view. In addition, the user can view his/her own user profile in the system settings, where the user also has the permission to make limited changes.
Start
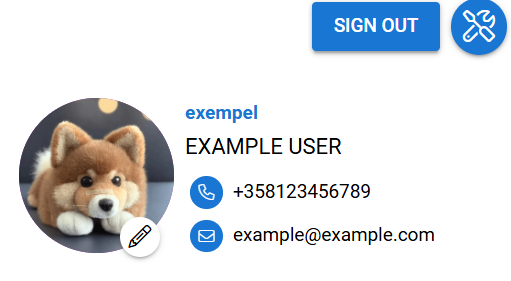
The user profile view (pictured below) is opened by clicking on the user icon in the top right corner of the system. This view contains basic information about the user, as well as buttons for logout and Outlook sync.
Change User Avatar
By default, the user avatar is a circular icon, showing the initials of the user’s username. However, you can change the icon to your own image if you wish. You can do this by clicking the avatar icon at the top right corner of the CRM interface, and then clicking the pen icon (see picture below).
![]()
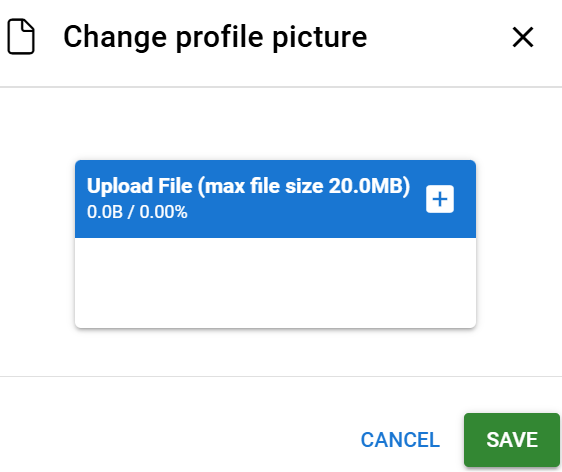
After the button is pressed, you will get a popup window prompting you to upload a file (maximum size 20MB). You can do this by pressing the plus icon (see picture below).
The user’s image is always displayed in a circle in the chat, so square images work best. The allowed file formats for the image are JPG, PNG, GIF and BMP and the recommended image size is 200×200 pixels.
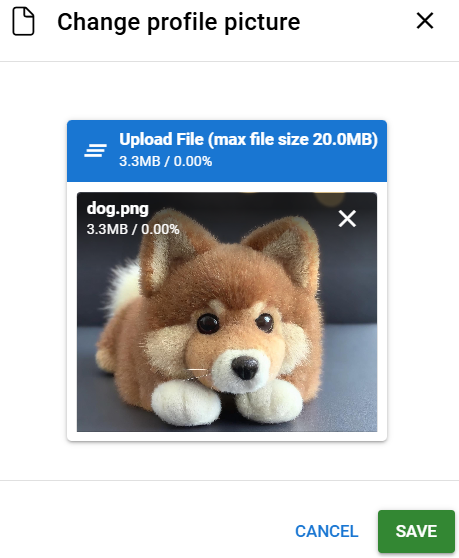
After the image has been selected, you can see a preview of it (see picture below). If you do not like the preview, you can remove the image by pressing the X at the top right corner of the image.
After you are happy with your selection, press save and enjoy your new image!
After the avatar image is added, there is no way to change back to the default avatar. However, there is no limit on how many times the user can change their avatar.