General
Announcements allow admin users to post various messages to the system, which are visible to users either in all modules or in a single module. In addition to being visible to all users, announcements can also be set to be visible only to selected reporting groups.
Admin users can use the settings to control not only the visibility of announcements, but also the color and translations of messages. A button can be added to announcements so that users can hide them after reading. A start and end date can also be set for the visibility of announcements.
For basic use you can also check the video guide Announcements – Learn as you go.
Getting started
The notification settings menu can be found in the system settings, which can be accessed by clicking the settings button (wrench icon) in the upper right corner. Then select Notifications from the System Settings menu.
This opens a view where the admin user can see existing announcements and create new ones.
The main view of announcements consists of the following parts:
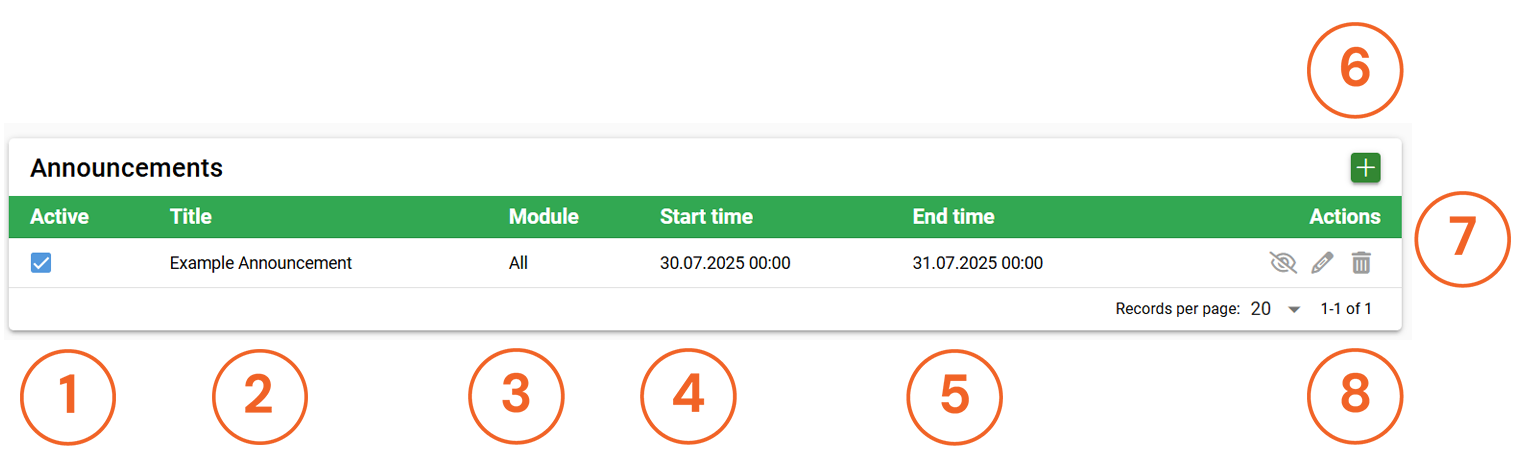
1. Active – This column shows whether the announcement is active in the system.
2. Title – This shows the name of the notification.
3. Module – This column shows in which module the notification is displayed.
4. Start time – The time from which the notification is visible in the system.
5. End time – The last time the notification is displayed in the system.
6. Plus button – This button can be used to add a new notification.
7. Functions – The functions buttons can be used to preview (eye) or edit (pencil) the notification, or to delete it (recycle bin).
8. Rows per page – This menu can be used to select how many notifications are displayed on a single page of the main view.
Creating and editing announcements
You can create a new announcement by clicking the plus button. You can edit an existing announcement from the announcement list view by clicking the pencil icon next to the desired announcement. You can fill in the following information for an announcement:
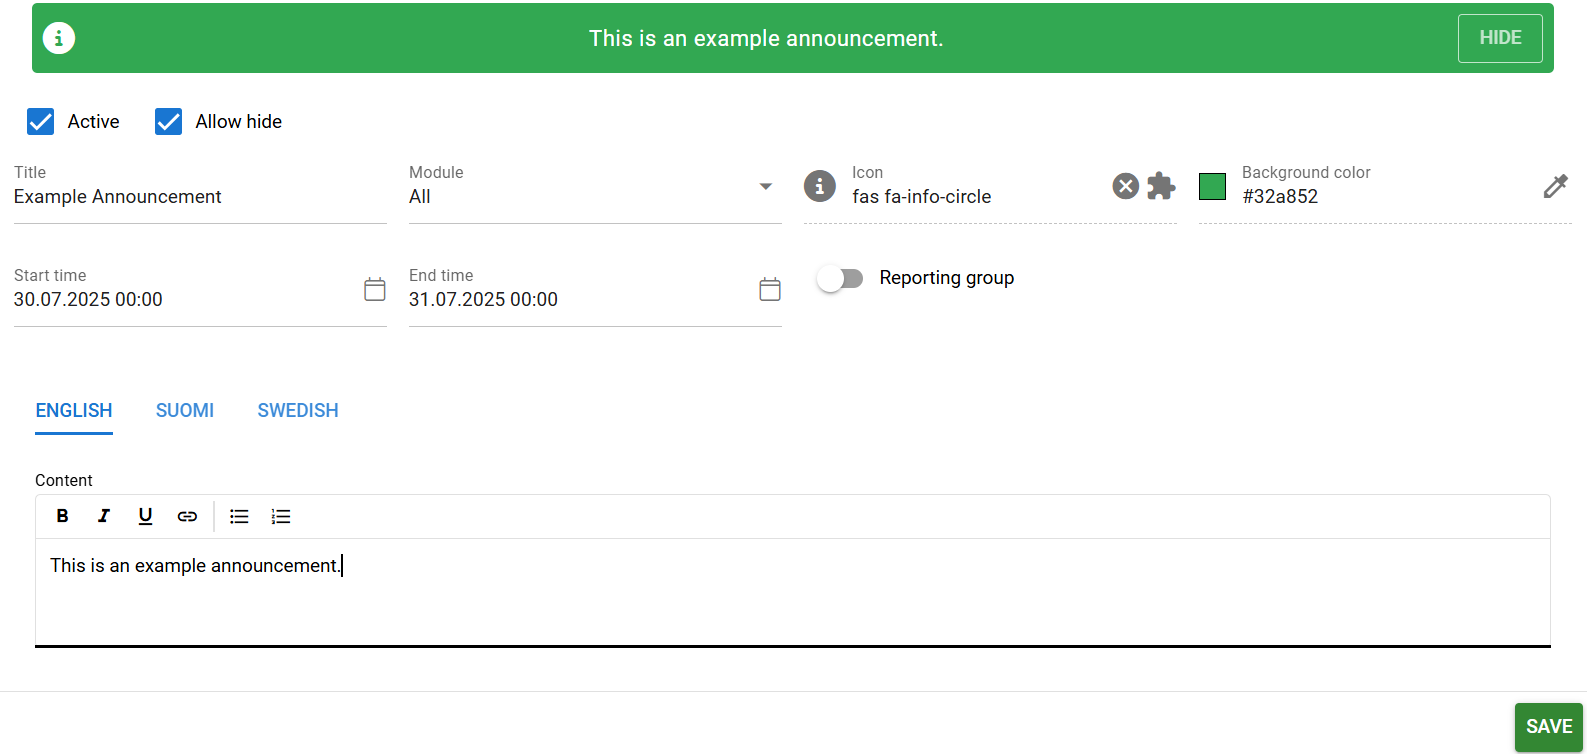
1. Active – This option allows you to turn the visibility of the announcement on or off.
2. Allow hide – This option allows users to click the Hide button displayed in the announcement, which removes the announcement from view for that user.
3. Title – The name of the announcement (not visible to users)
4. Module – This option allows you to display the announcement in a single module or in all modules.
5. Icon – You can give the announcement its own icon, which will be displayed on the left side of the banner (optional)
6. Background color – Specifies the color of the announcement banner.
7. Start time – When the announcement becomes visible to users (optional).
8. End time – How long the announcement will be visible to users (optional).
9. Reporting group – The announcement will only be visible to selected reporting groups (optional).
10. Translations – The tabs show all languages used by the system. If the language content box is left blank, the system will display the notification banner, but the banner text will indicate that no translation is available.
11. Content – Write the text you want to include in the notification here. Remember to fill in the content for all languages in the system.
Announcement styling and content
You can choose the color of the news item using the color selector in the settings. You can also add an optional icon to the news item. You can always preview the news item at the top of the creation/editing view.
In addition, you can preview the appearance of existing announcements by clicking the View button (eye icon) in the announcement list view to get the best picture of how the announcement(s) will look in the system.
In addition to the appearance, the text itself can also be formatted in the Content block. The block provides users with basic text formatting (bold, italics, underlining, lists) and the option to add links to the text.

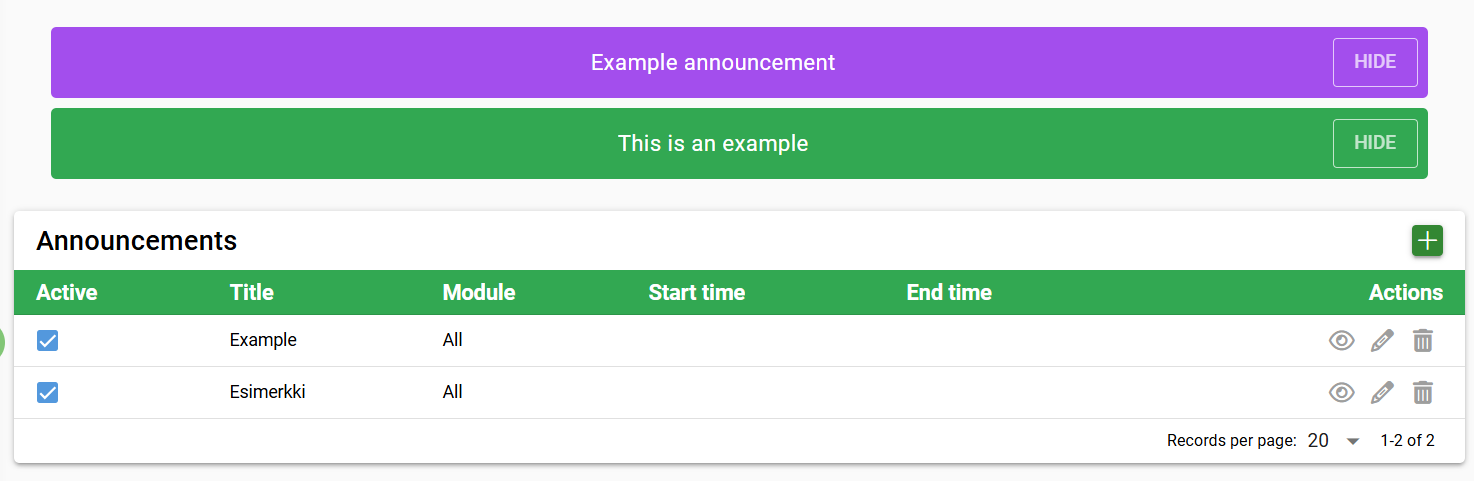
The content shown in the example image would look like this in the system:

Please note that announcements always take up part of the user’s screen. The more text there is in an announcement, the less workspace the user has on their screen. This should be taken into account when designing announcements and the option to use links to shorten the text should be utilized. Currently, the system allows you to hide notifications, so this option can also be used for large notifications. Usability improvements are also coming in future updates.
Translations of announcements
Announcements are displayed to users in the language they use to access the system. For example, users of the English version of the system will see the translation in the English tab.
The admin user manages the translations themselves, and if no translation has been provided, the message “Translation not available” will be displayed in the announcement. If you want a message to be displayed in only one language but also want to ensure that users logged into the system in other languages can see it, copy the message content into the text box for each desired language.
As a rule, we recommend that the content of all language options be filled in either with a translation or copied text to ensure that the message is visible to all desired users.