General
This tool is used to merge the information of duplicate entities, including relations. You can do this with entities that are located either in Accounts or Contact modules. The tool must be activated by the admin user.
This tool allows users to easily merge duplicate entities by selecting a target entity and then selecting the entity they want to merge to the target entity. After the merge, the duplicate is removed, and the target Account or Contact replaces the duplicates in all modules the merged Account or Contact is used, with some exceptions that are listed next paragraph.
Restrictions
The most important thing to remember is that after the merge is completed, there is no turning back – deleted entities are lost forever. It is also important to acknowledge that the following restrictions are applied to the merged entities:
- Email logs are not transferred to the target entity.
- Formulas and dynamic conditions are not run during merging.
In Mass Events the contacts are replaced in Registrations and Staff, but replaced contacts are not merged to one single contact. Because of this, it is important to remove duplicate contacts from the Registrations and Staff by manually canceling the registration of duplicates after the merge is completed.
The Entity Merge module tool requires the user to have the permission to delete entities. If the user does not have delete permission, the tool will not be visible even if it is activated.
Start
Because the effects of the merge will be irreversible, this is an advanced tool to use with caution. To avoid accidental changes to data, we highly recommend this tool be used only by users who have permission to see all the information from the entities they are merging. Please read these instructions carefully before proceeding with the merge.
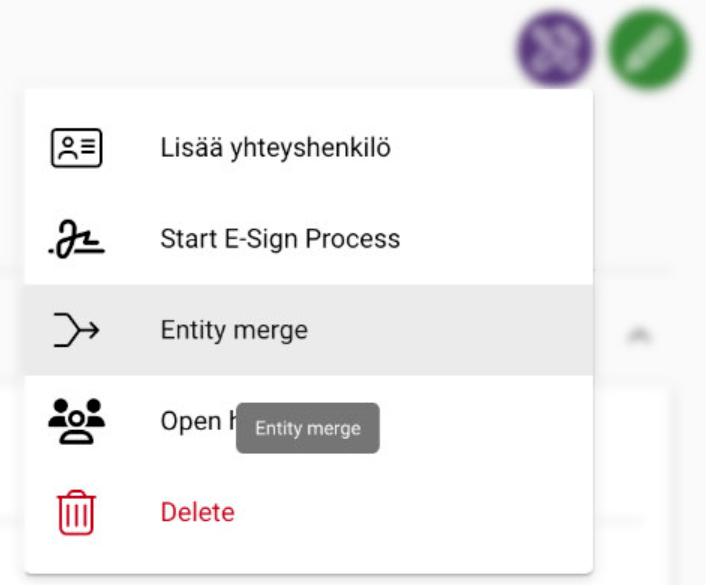
Merge is started in the wanted module (Accounts/Contacts) by first opening the card of the entity that is part of the merge. In the entity card, the tool can be accessed by clicking the Module tool icon and by selecting merge from the menu.
After this, it is time to select the entities to merge:

Choosing the information to be kept
Once you have chosen the entities to merge, the next step is to choose which data you want to keep in the different fields. First, make sure that the target entity and the entity to be deleted match your choices (1). Then go through each field and select from the drop-down menu the information you want to store in the target entity (2). Once you have made your selection, make sure you accept the changes (3) and go to the next page to view the data summary (4).
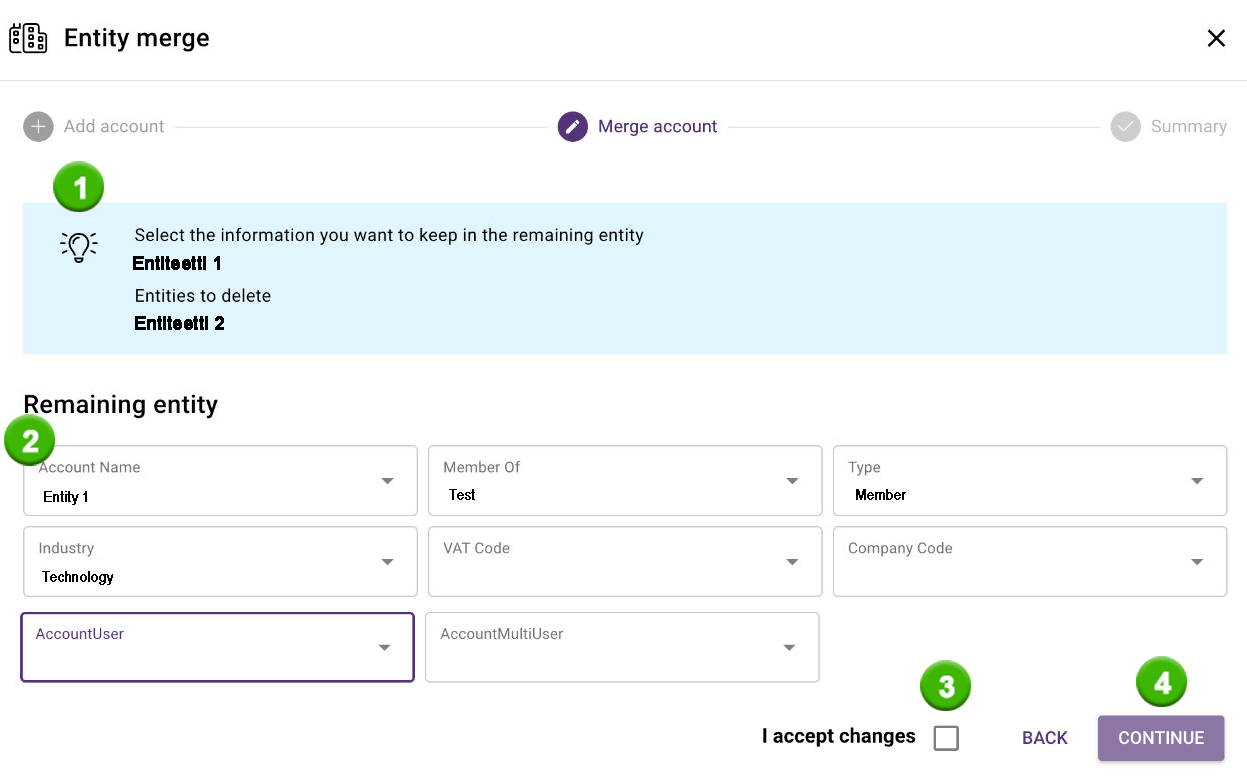
If the user does not have permission to access the field containing data, they will not be able to choose what data is stored. For this reason, we do not recommend using this tool if the user cannot see all fields of the entities to be merged. If the tool is used despite this, it may lead to data loss.
Check the summary and confirm the changes
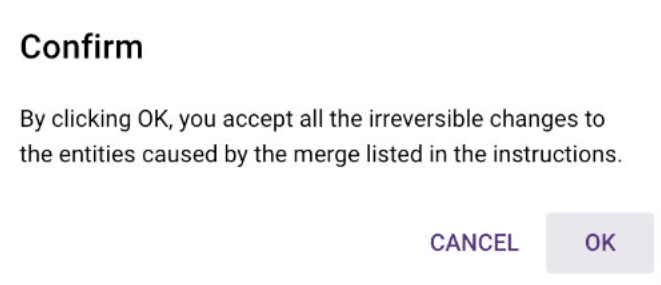
Once you have gone through the summary, you can approve the merge after you have checked that all the information is correct. You will then see a confirmation screen where you accept the merge of the entities.
Once you have clicked OK, there is no return from the merge and the data to be deleted from the entities will be irretrievably lost.
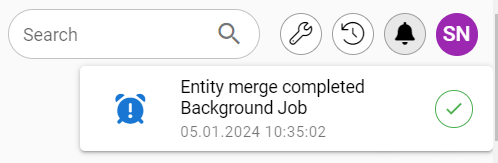
When you press OK, you will receive this notification in the top of the screen:

After this, the system will work the merge on the background. You will get a notification (bell icon) when the merge is completed.

After a successful merge, the duplicate is removed from the system, which improves database management and harmonizes the data in the system.