General
It is possible to get a lot of information into the list view of a CRM by using filters. To facilitate browsing large amounts of data, the user can choose to pin the first two columns of the list to appear sticky in the list view. The pinned columns then remain in place regardless of which part of the list the user is viewing.
This guide only deals with the pinning of filter columns and related settings. If you would like to learn more about how filters work, please see the article Complete Guide to Filters.
Getting started
Columns can be pinned to an existing filter by modifying it, or they can be added to the filter settings at the creation stage. Whichever method is used, all the settings required for this feature are turned on in the Fields tab of the filter settings view.
Quick Start Guide
- Open the settings view of desired filter.
- Go to the Fields tab.
- Place the fields you want to pin to be sticky in the first two fields by dragging them into the desired order.
- Select the fields to be pinned (either first only or first and second).
- Save the filter.
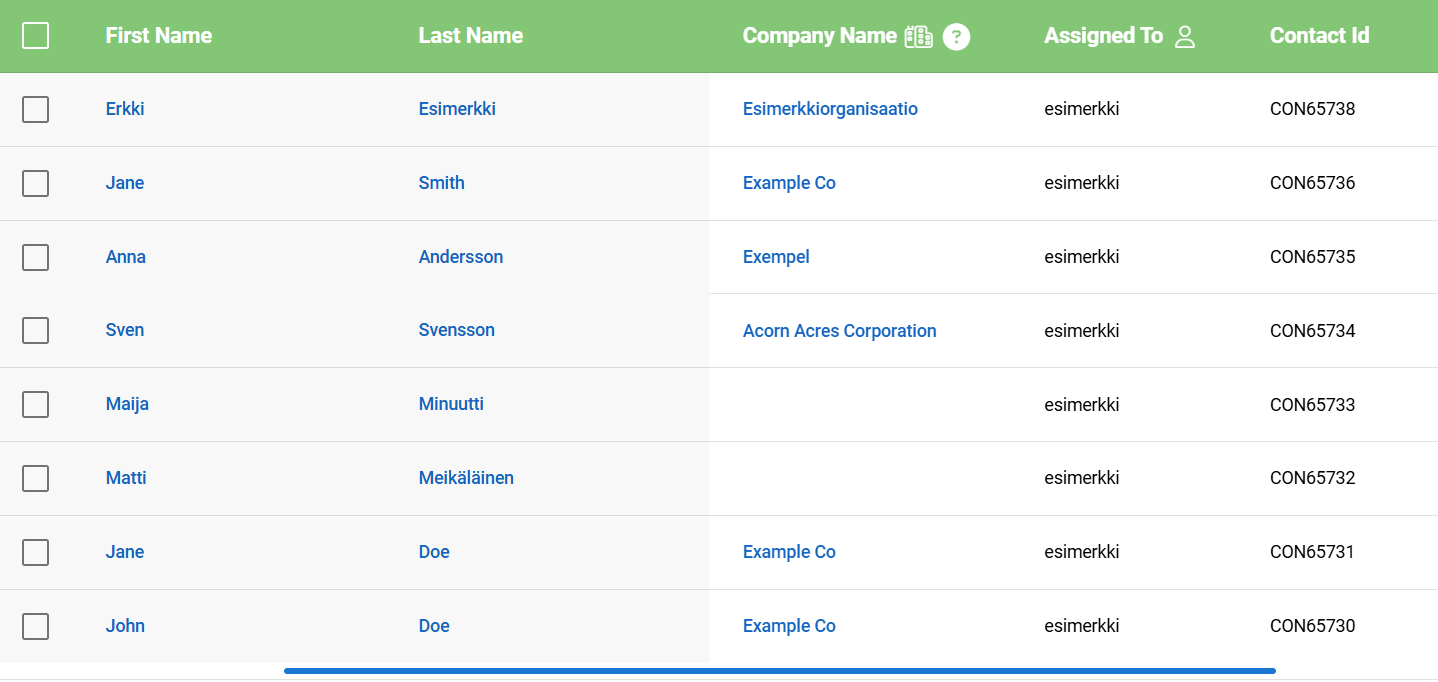
The selected fields are now pinned to the list view of the filter, where they appear on a grey background
Pinning fields
Open the filter editing view or start creating the filter from scratch. To pin the columns, go to the Fields tab and look for the Sticky Positioned Columns picklist below the fields (see picture below).
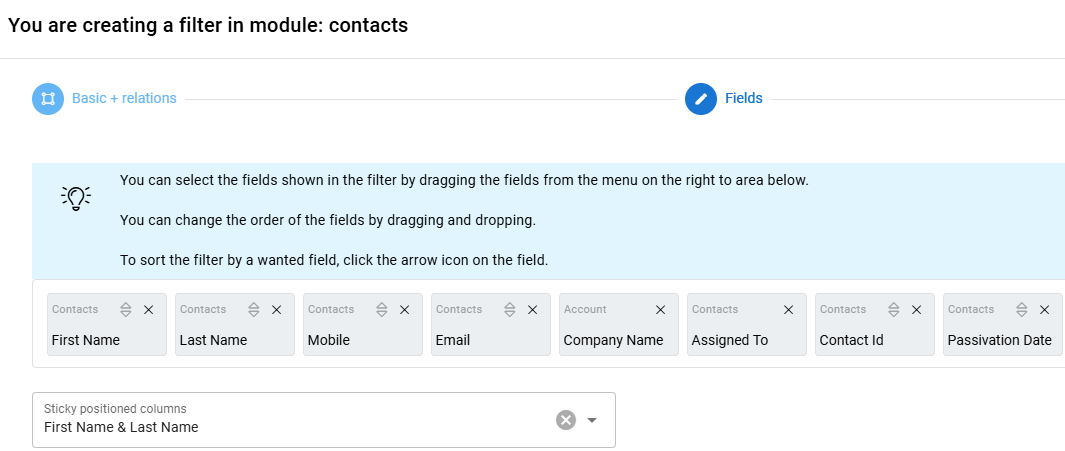
The Sticky Positioned Columns picklist always gives the user two options. The user can select either the first field in the filter (First Name in the example) or the first and second fields (First Name & Last Name in the example). The second field cannot be selected separately and changing the field order will also change the options provided by the system.
The values selected in the drop-down list are automatically updated when fields are moved. So if, for example, in the example image, the Email field were moved in place of the Last Name field, the two fields in the selection list in the image would be updated to First Name & Email.
The end result
Once the desired fields are selected, they will appear in the list displayed by the post-save filter on a darker background (image below).