General
Work hour reporting is a process that utilizes few functions to provide easy to use reporting system. In this guide, we provide all the needed parts in one instruction page. This covers how to use specific parts of the system when doing work hour reporting. You can always find out more about the specific functionality by following the link to the instruction page of said functionality.
Start
To begin, there is a need to create a project to which staff is then attached. Hours tracked are added to the projects as products. To track the hours, staff needs to attach a proper element to their dashboard. Another element can be used to track the summary of the hours and possible travelling expenses.
Quick Start Guide
- Create a Project.
- Add phase(s) to the project.
- Add hours (Product) you want to track in the created phase(s).
- Add staff to phase(s).
- Staff can now start tracking hours by adding proper element(s) to their dashboard.
Creating the Project
A new project is created in the Projects module. When creating a new project, you must fill in at least the following fields:
- Project Name
- Assigned to
- Start Date and End Date
Project steps are added from the More actions -button in the lower right corner of the project, which includes the Add new phase -function as well as the Change order, Disable all, and Activate all functions.
The phase form can be filled in with a wide variety of information:
- Phase name
- Active – Work hours can only be marked into active phases.
- Description
- Start and End Date
- If necessary, the work can be assigned start and end times that differ from the schedule of the entire project, if it is not intended to mark hours for the work throughout the project
- Product – Billable tasks must have their own products created in the Products module.
- Agreed hours – If a certain number of hours have been agreed upon for the work, it can be entered in this field.
- Price – Depends on the selected product. If it is desired that the price does not change when the price of the product changes, it can be made fixed.
Adding billable hours to the project
To report work hours, the phase must be active and billable tasks need their own products, which can be created in the Products module. The Usage Unit must be set to hour.
Adding staff to the project
For each phase of the project, there is a control panel, through which the project can be edited, copied, or deleted, and employees can be added to it. Adding employees to the project is done by pressing the Edit phase staff button (person icon).
After pressing the button, the user gets a list of people who can be added to the project. People added to the project can fill in hourly records for the project while it is active.
In order for the element used to work hour reporting to function properly, start and end dates must be set for the project. These days can be changed later, but both are needed for work-hour reporting.
Hour tracking using elements
Work hour reporting elements aka widgets are called Workhours and Project hours. Project hours can be used to track worked hours on different projects. Workhours, on the other hand, give the person a summary of tracked work hours.
You can quickly add both of the elements in your dashboard using the following quick start steps:
- Go to your Dashboard.
- Press Edit.
- Press Add new element.
- Give wanted information and press Save.
Project hours
Project hours only need a name and using the downward arrow you can select which projects you want to pin in the element to your favorites by using the pin icon. You can also use the picklist to switch between projects without pinning them to the element.
When you want to add work hours using this element, you just select the correct day and project by clicking it. Then you get all different options to fill in the information which is available on the specific project. After you have filled in all the information you want to add, just press save and the element updates the hours.
Workhours
The Workhours element requires a little bit more settings than just a name. You need to fill in the period for both target hours and travel expenses to determine the period of the summary shown in the element. Both can be adjusted separately and the available periods are month, quarter, and year.
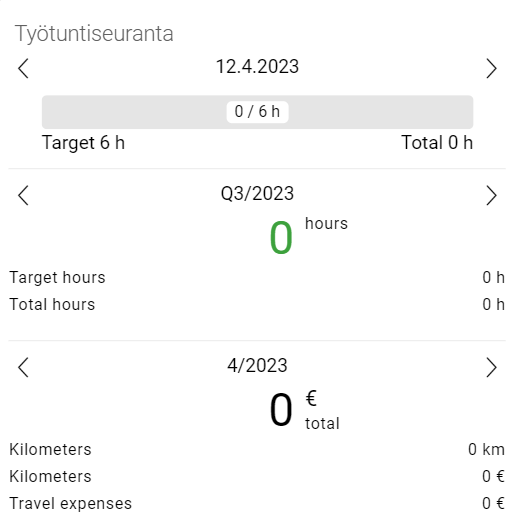
If the user has target hours in their preferences, the summary field’s number (green zero in the picture above) shows the difference between the targeted and the accumulated hours. The user can determine their personal target hours in My preferences (and an admin can determine the hours of any user in Settings → Users) by filling in the hours in the field Daily hours.
When the settings of this element are right, it will work automatically and the information it provides is automatically updated if the data it uses changes.